Status
The Status field allows users to set the state of a record, which sets the data based on the value selected in the Status field.
For example, if the user needs a field to hold the status of candidate applications for a job opening, the Status field can come in handy.
The user can create a Status field with values '0' (Applied), '1' (Shortlisted),
'2' (Rejected), '3' (Hired) and '4' (On Hold). The user can then use the Status field to set the state of the
candidate's application.
Steps
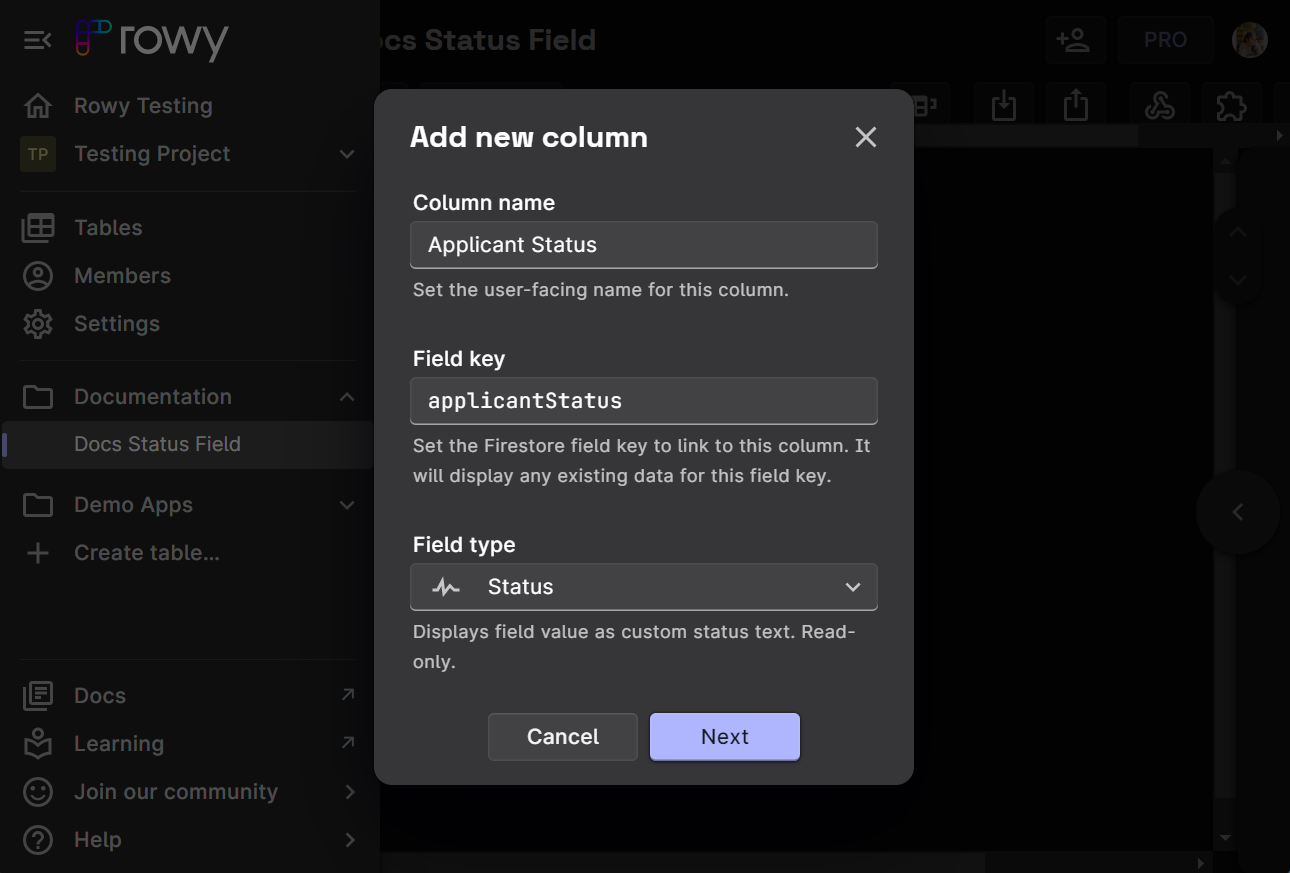
After creating a table and the required columns, click on the Add Column button to add a new column.
Add the Column Name and set the field type to Status.
Set the Default value type according to the requirement. It is the default value that the cell would hold when the user creates a new row.

The default value type can be set to:
Undefined
The default value is not set. The undefined values do not appear if the list is sorted in ascending / descending order. This makes the column field unsortable if left blank.
Null
The default value is set to
Null. The Null type allows the column to be sortable without setting an actual value.Static
The Static type enables the user to customize the initial value of the column. The user can set the value to any of the values in the Status field.
Dynamic
The default value also supports a Dynamic type. The user can set the default value automatically, making it adhere to specific conditions once a new row is created.
Now, the user can add Conditions. Conditions can be easily configured according to the user needs. The user will be able to select the cell label from the dropdown (existing conditions) and the corresponding value will be set in the Firebase Collection.
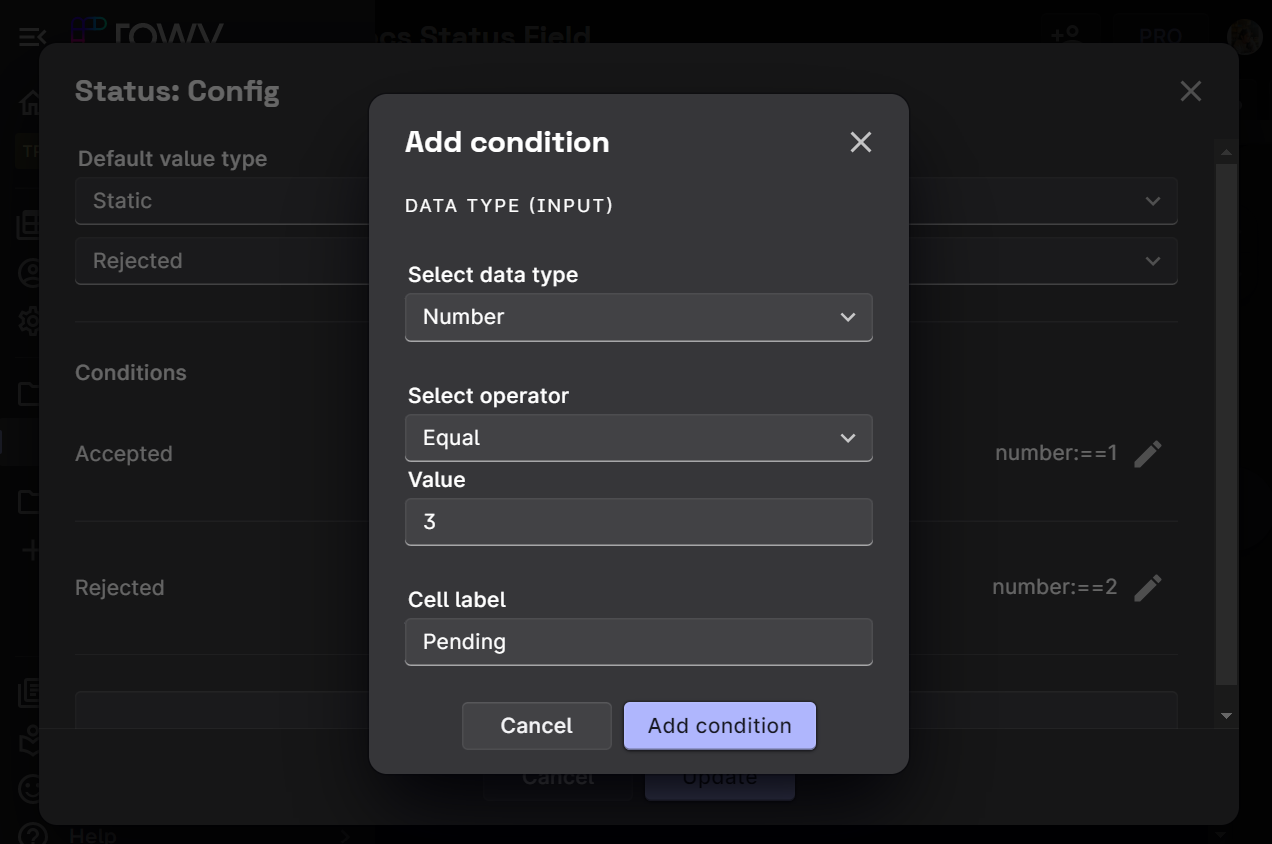
Click on the Update button.
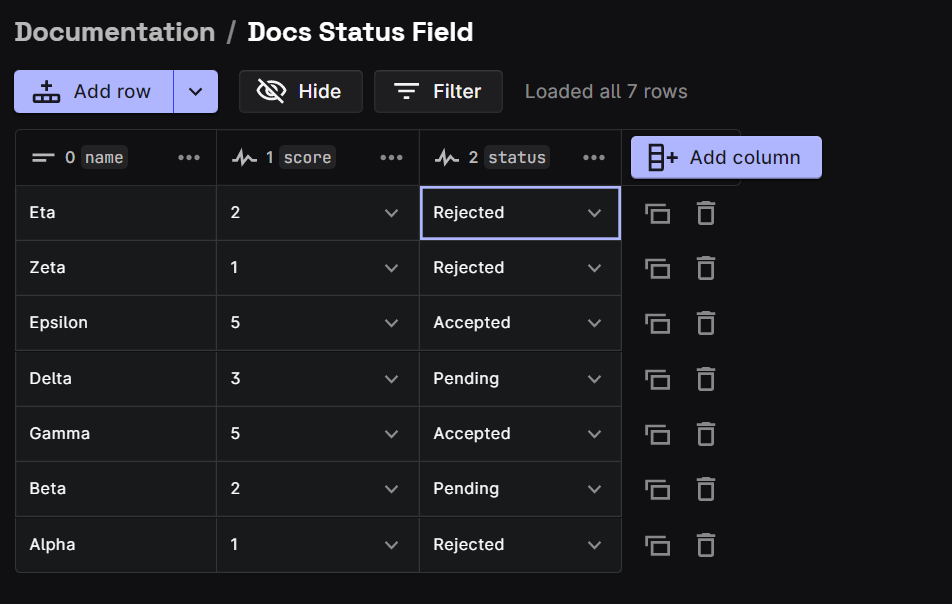
Here's a glance of what the output table can look like.
Notes
- For more information on how to set default values, check out the Set a default value page.