Import CSV / JSON
Rowy allows you to import CSV / JSON (or TSV, from URL) files to your Firebase database. You can import to an existing Firestore datastore or create a brand new collection right from Rowy.
Steps
After creating a new table, click on the Import Data button.
Select CSV as the data source.
Click on Continue to start the import process.
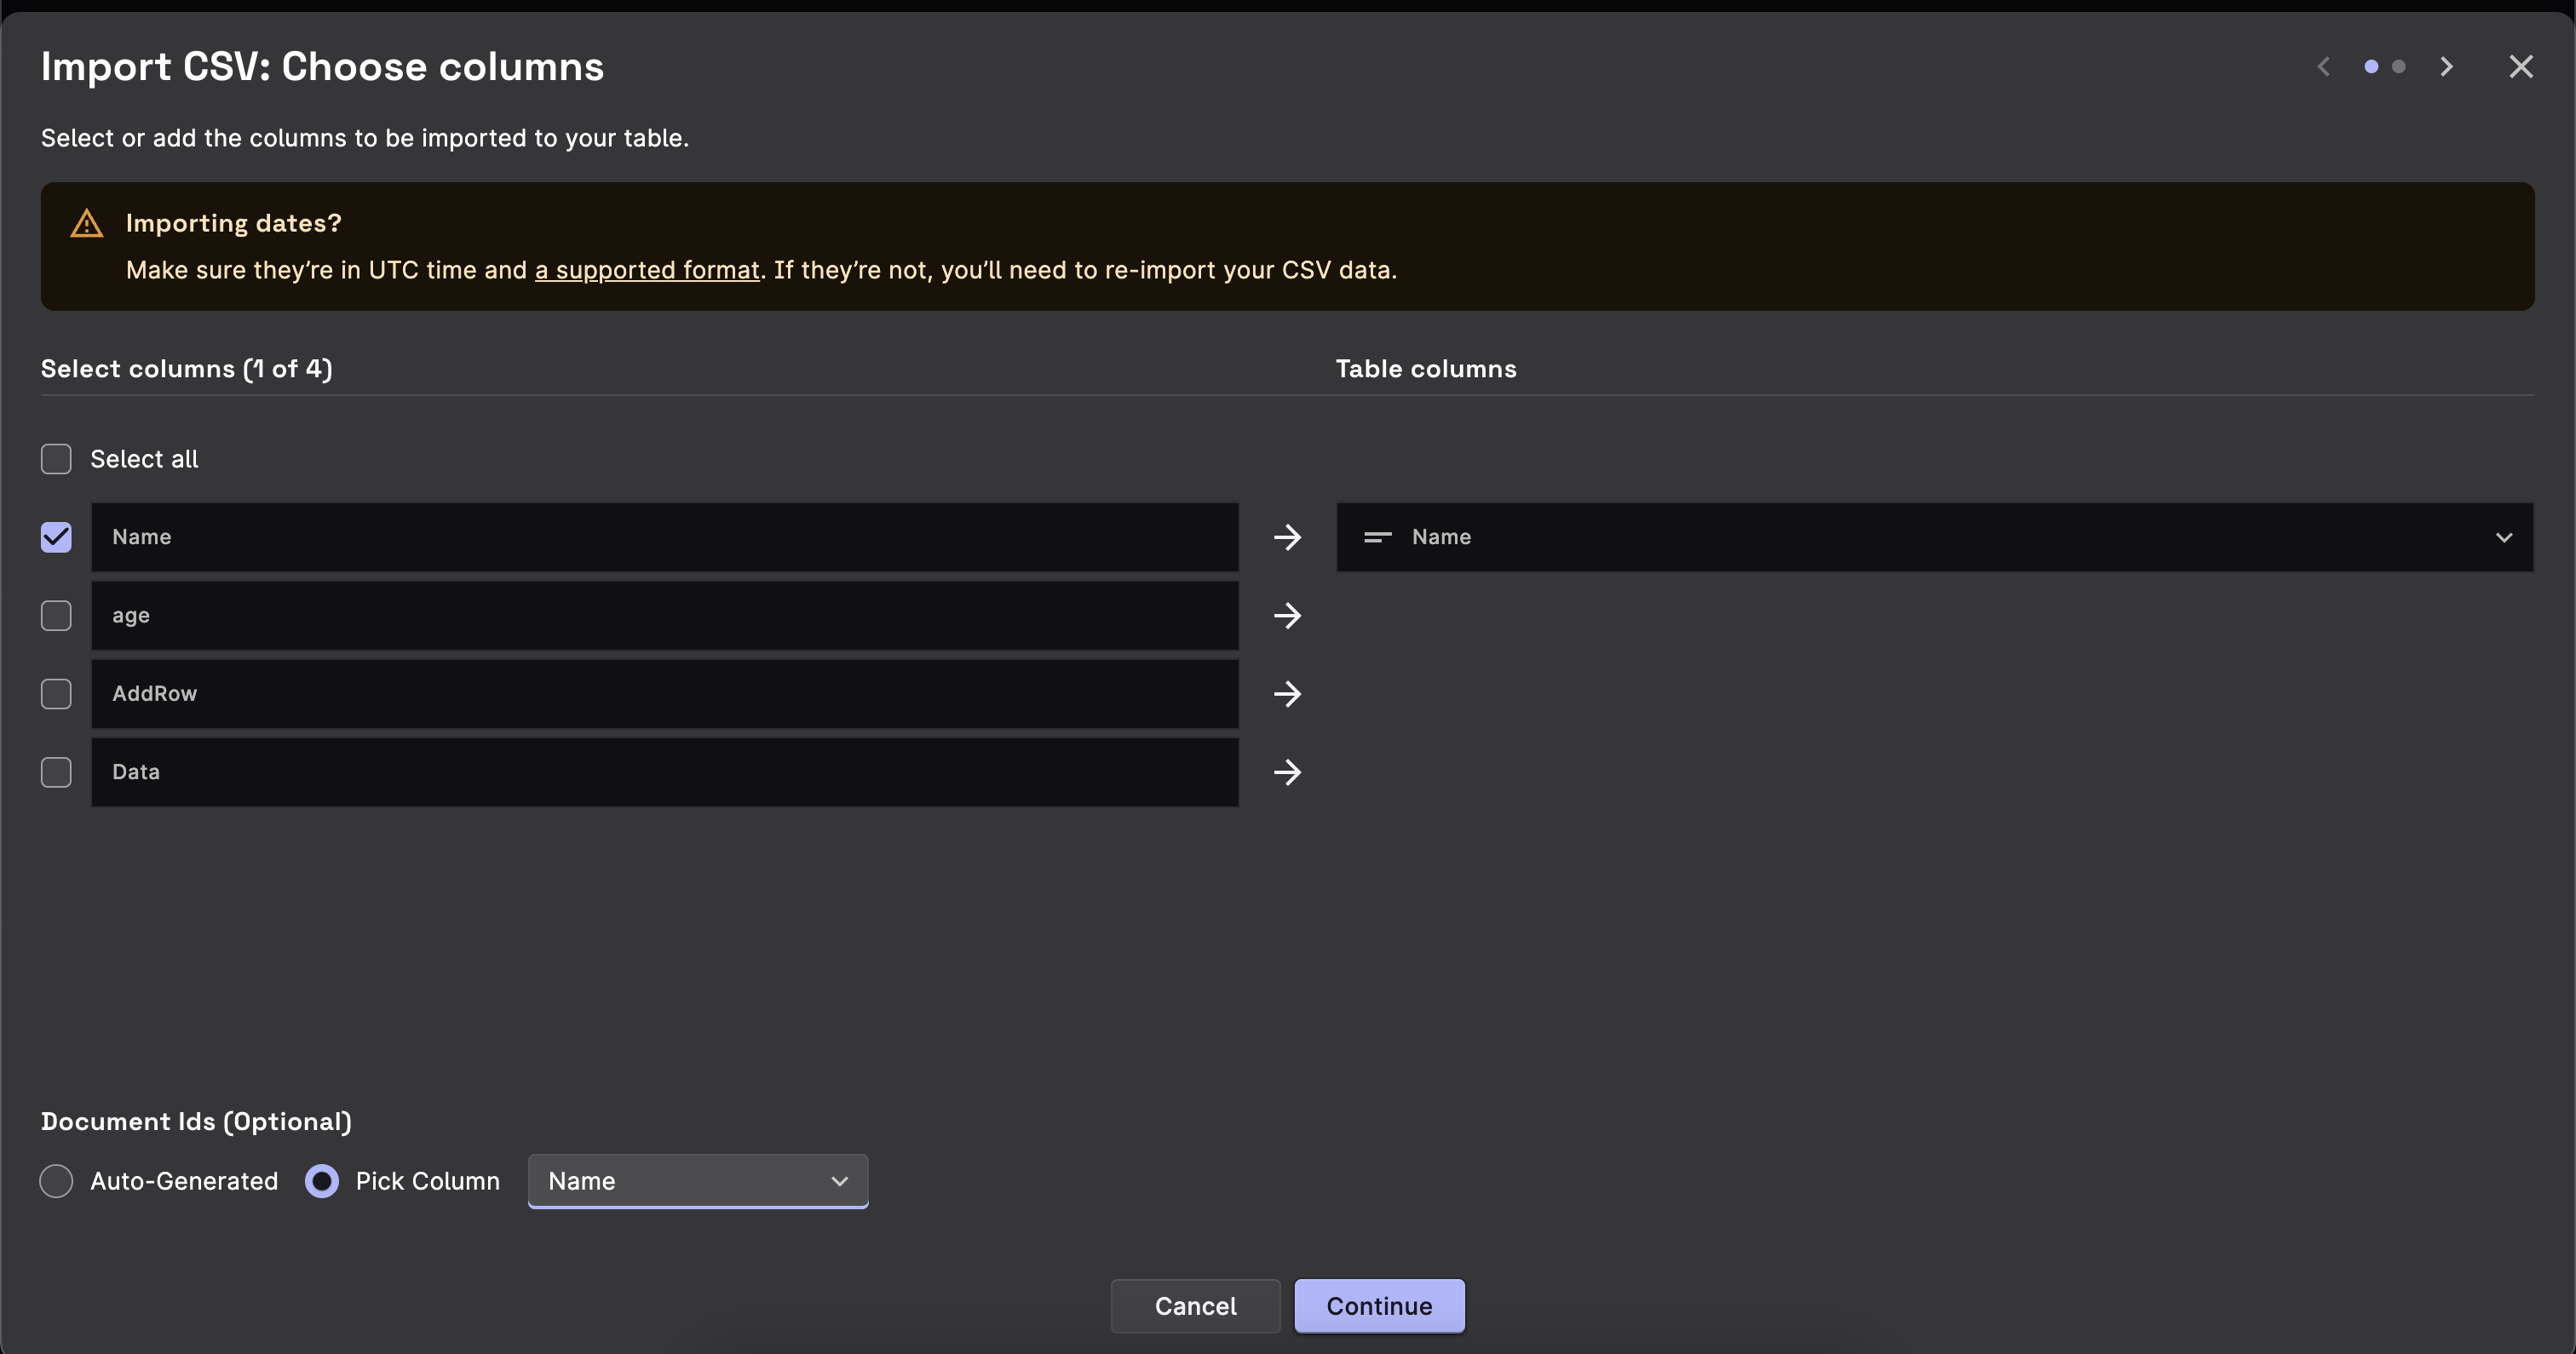
Select the columns to be imported to Rowy, click Continue.
Review the data to be imported and click Finish.
Autogenerated Id vs Custom Id
While importing data via CSV, JSON or other sources - you have option to select between
- Autogenerated Id (default)
- Custom Id
Autogenerated Id means Rowy picks the value of the Id of each row by default (similar to how adding data to Firestore would look like). These are random Ids for each document.
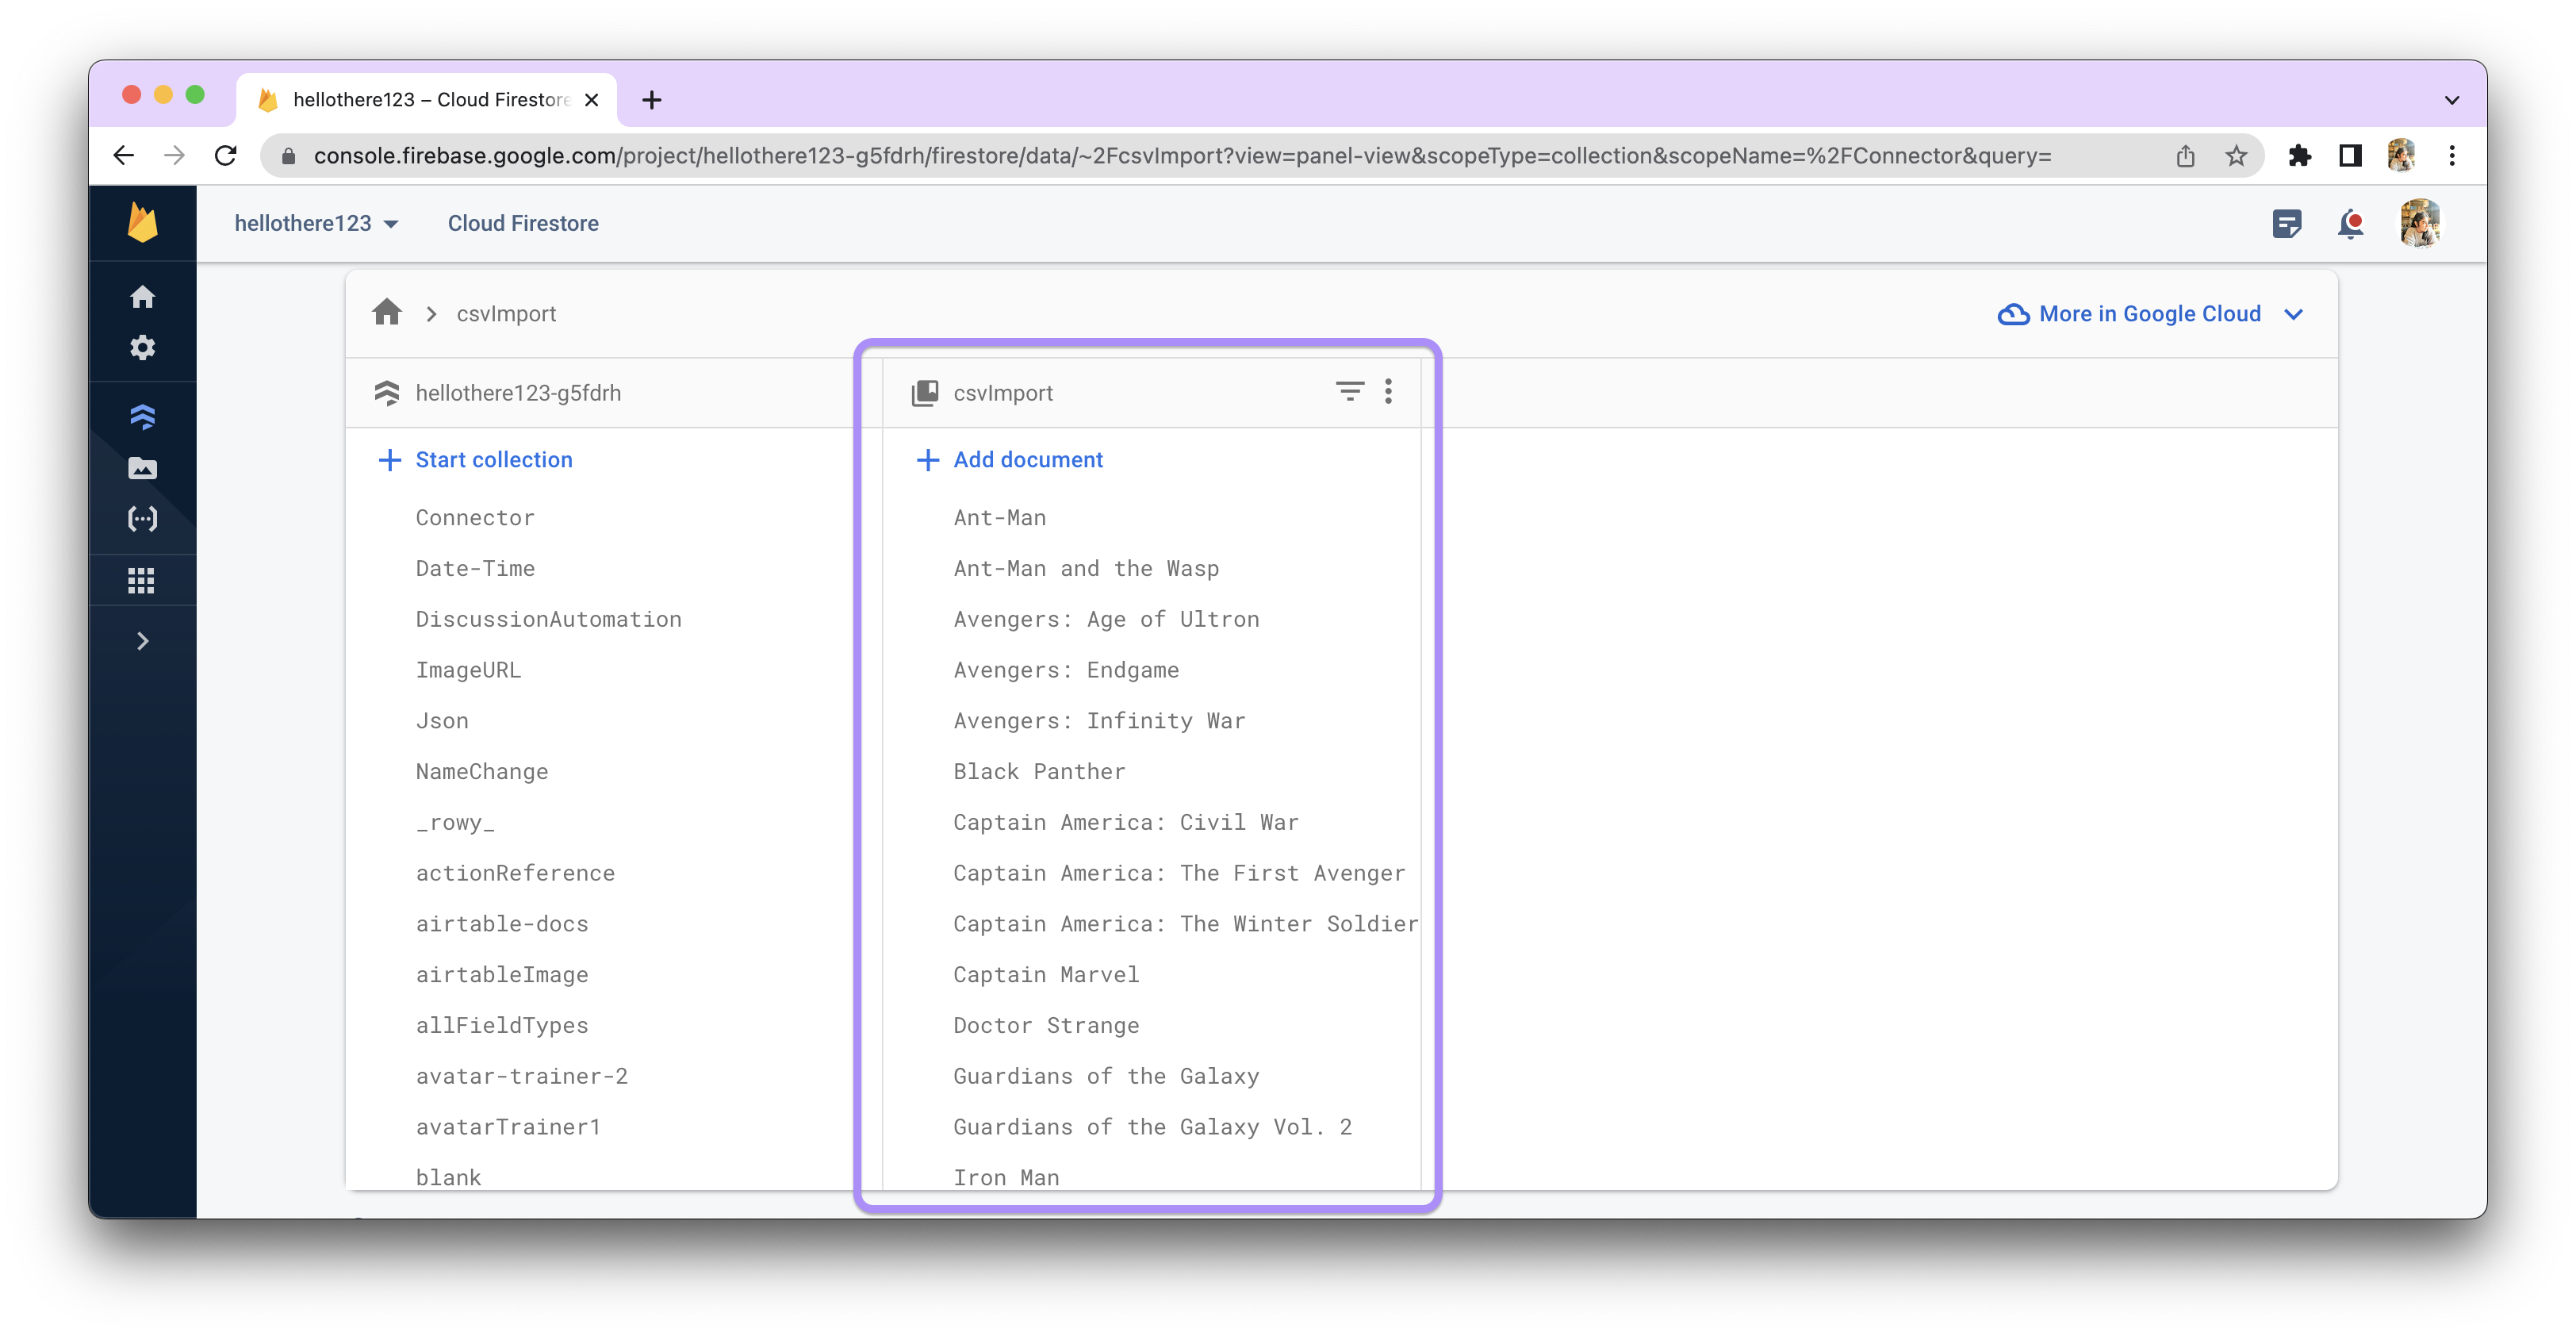
Custom Id option gives you ability to pick the Id from one of the columns of the imported data. The imported data based on your own custom id gets stored in Firestore in alphaneumeric sorted way as shown below.

Applications of Custom ID
Let us understand it's applications with the help of some examples:
Case 1: Accessing data from another collection
Let's say we have a Derivative function that fetches data from another collection.
const regionDoc = await db.collection("touristAreas").doc(row.touristArea).get();
return regionDoc.get("region");
The db parameter can access your Firestore to access any collection or document.
The above line above would find the collection named touristAreas in your Firestore Database, and try to search for a document with its Document-ID matching the value in the field touristArea in your current collection. This would return the region field of the found document.
Case 2: Bulk updating fields via Import
Importing data via a CSV file is the way to go for bulk updating data in your table. Make sure you're using Custom-ID for your data as described below. Export the data from your Rowy table as a CSV file first. This will incorporate the same column names as the ones in the Rowy table.
Thereafter, add data to it and import it back again into your Rowy project (make sure you have selected the same field as the Document-ID). This will let you update the records.
Bulk Updating Fields
For Bulk Updation, try initializing the data as a CSV import as well. Then export ALL the data columns, make the changes in the CSV and reimport ALL the column with a match on the ID field.
This will help match the Document-ID to that in the Firestore collection.
If you try to update records that were not added via the import CSV method, or if you try to add only partial set of column values - it will result in duplicates or deletion of columns that are not being imported if there is a match - i.e. only columns being imported will be present, rest of the columns will become blank.
How to bulk update if you have Autogenerated IDs
If you would like to export your data and make changes in bulk and reimport them back on a table that has auto generated IDs, then follow these steps.
NOTE: If you are not sure about these steps, we recommend trying it out on a test dataset table before doing it on production data.
- First add an ID column to your table. This will ensure you can match with this ID column.
- Export ALL the columns of your table to CSV. You must export all columns to avoid blank data being written.
- Make changes to your CSV data file that was exported
- Re-import back this edited CSV file and make sure to import ALL the columns and match by the ID column as the Document ID.
The last step is super important. If you do not import ALL the column, then when a match is found by an ID then it will only write the data columns that are being imported i.e. it will remove columns that are not present in the import.
Also, if you do not update from Automatic Id generation to Custom ID column then it will create new rows instead of matching them.
Changing Auto-generated ID to Custom ID
If you have your Document-ID auto-generated, you can perform the following options to set custom IDs:
- You can export your table to a CSV file using the export option in the top right menu.
- Create a new table and import the data via the same CSV file.
- While importing, if you scroll down, you'll see an option for setting Document-ID.
- Choose Pick a column and select a column you want to keep as the Column-ID.

- Going forward, when you add a row, you can select the option to add a row With Custom-ID so it asks you to provide a Document-ID everytime.

Supported Field Types for import via CSV
Potentially, import by CSV will support all the field types supported by Rowy (check them out here). However, for now, we support the following field types:
Text
| Name | Description | Data Type | |
|---|---|---|---|
| Short Text | Text displayed on a single line. | string | |
| Long Text | Text displayed on multiple lines. | string | |
| Rich Text | HTML edited with a rich text editor. | string | |
| Email address. Not validated. | string | ||
| Phone | Phone number stored as text. Not validated. | string | |
| URL | Web address. Not validated. | string |
Select
| Name | Description | Data Type | |
|---|---|---|---|
| Single Select | Single value from predefined options. Options are searchable and users can optionally input custom values. | string | null | |
| Multi Select | Multiple values from predefined options. Options are searchable and users can optionally input custom values. | string[] |
Numeric
| Name | Description | Data Type | |
|---|---|---|---|
| Number | Numeric value. | number | |
| Toggle | True/false value. Default: false. | boolean | |
| Percentage | Percentage stored as a number between 0 and 1. | number | |
| Rating | Rating displayed as stars. Max stars is configurable, default: 5 stars. | number | |
| Slider | Numeric value edited with a Slider. Range is configurable. | number | |
| Color | Color stored as Hex, RGB, and HSV. Edited with a visual picker. | Color |
Date & Time
| Name | Description | Data Type | |
|---|---|---|---|
| Date | Formatted date. Format is configurable, default: yyyy-MM-dd. Edited with a visual picker. | Timestamp | |
| Date & Time | Formatted date & time. Format is configurable, default: yyyy-MM-dd HH:mm. Edited with a visual picker. | Timestamp |
Code
| Name | Description | Data Type | |
|---|---|---|---|
| JSON | Object edited with a visual JSON editor. | object | |
| Code | Raw code edited with the Monaco Editor. | string |