Setup Automated Table Roles
For all the existing roles in your table, you can setup automated roles for each table in your Workspace directly from your Table Settings.
Pre-requisites
Follow these steps to enable the automated roles for your table:
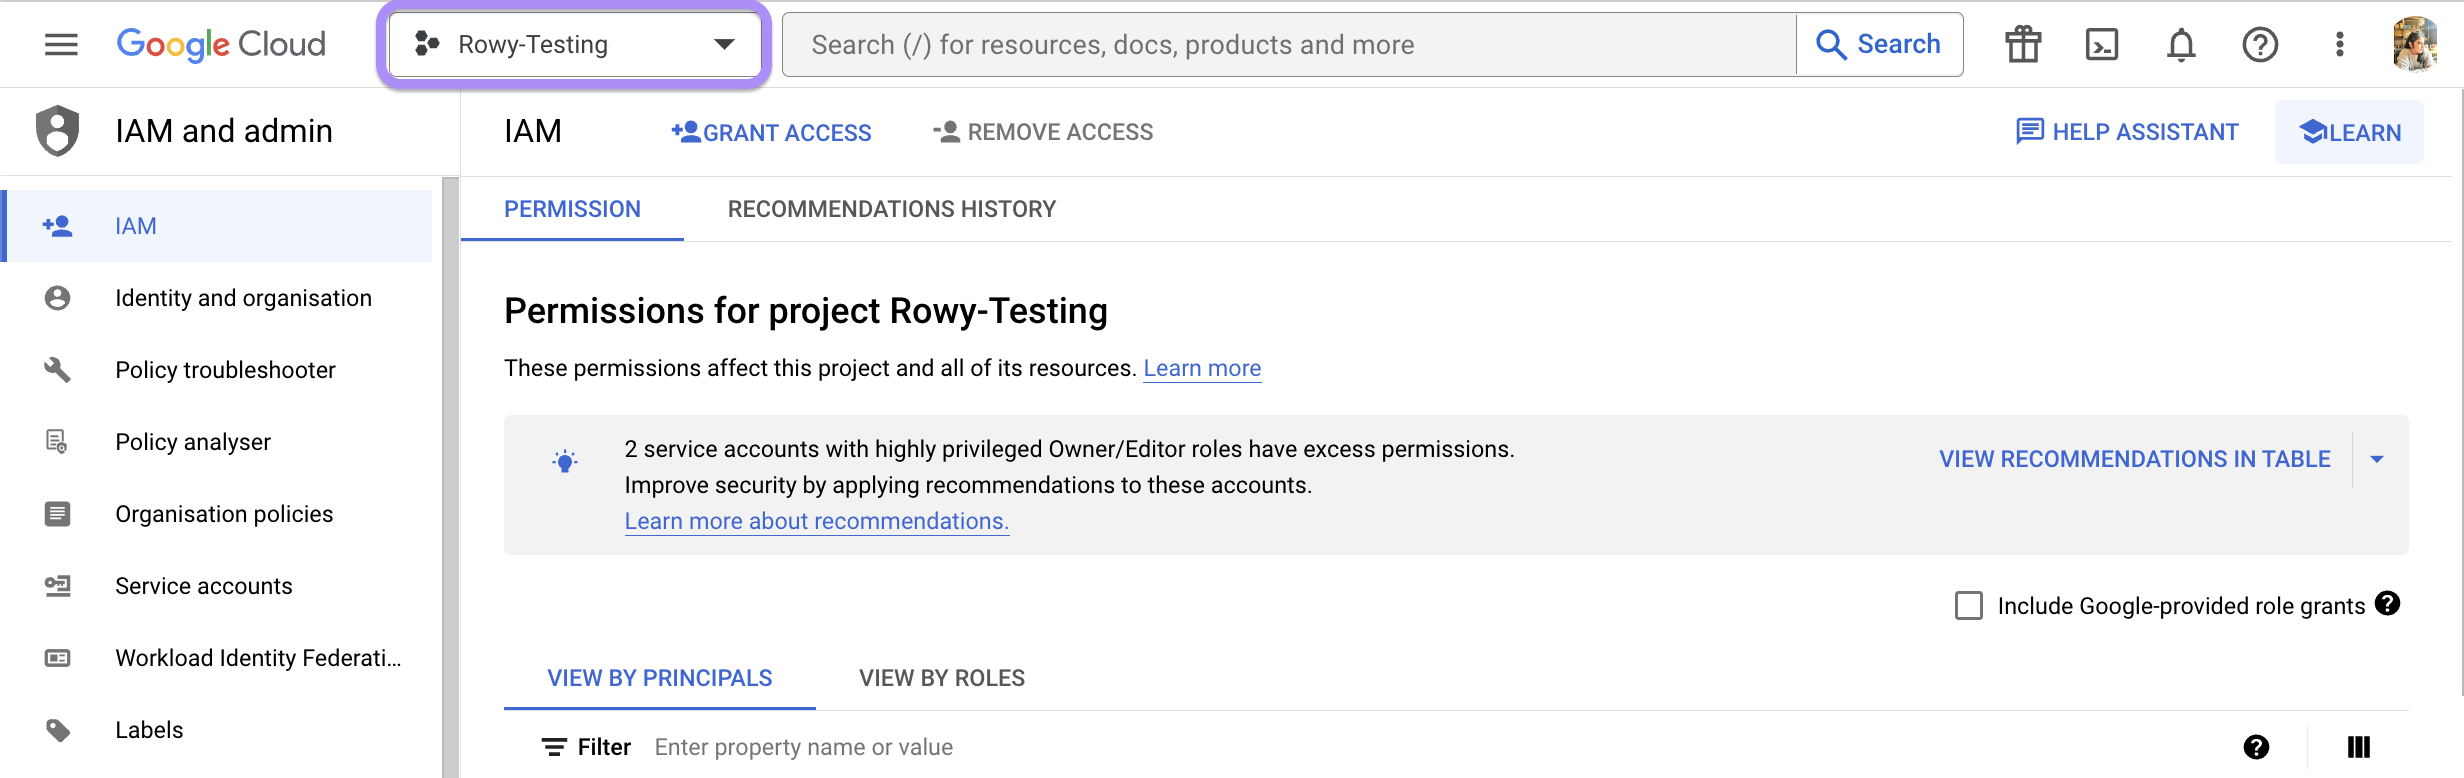
STEP 1: Go to IAM and Admin in your GCP Console.
NOTE
Make sure you have the correct project selected in the top left corner of the console.
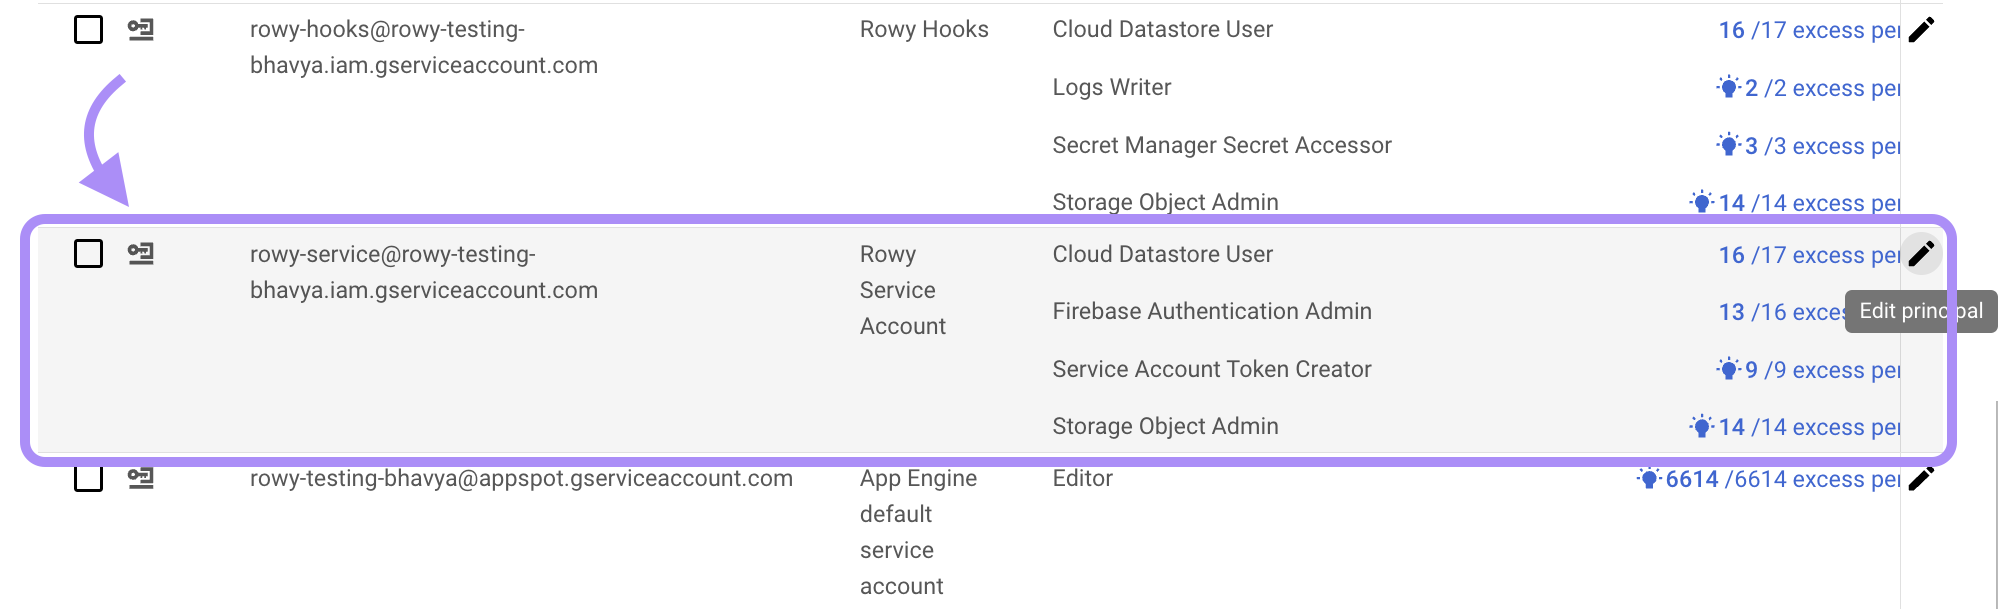
STEP 2: In the following Principals, look for rowy-service@… and click on the Edit button.
STEP 3: In the following side menu, click on the Add another role button and select the Firebase Rules Admin role.
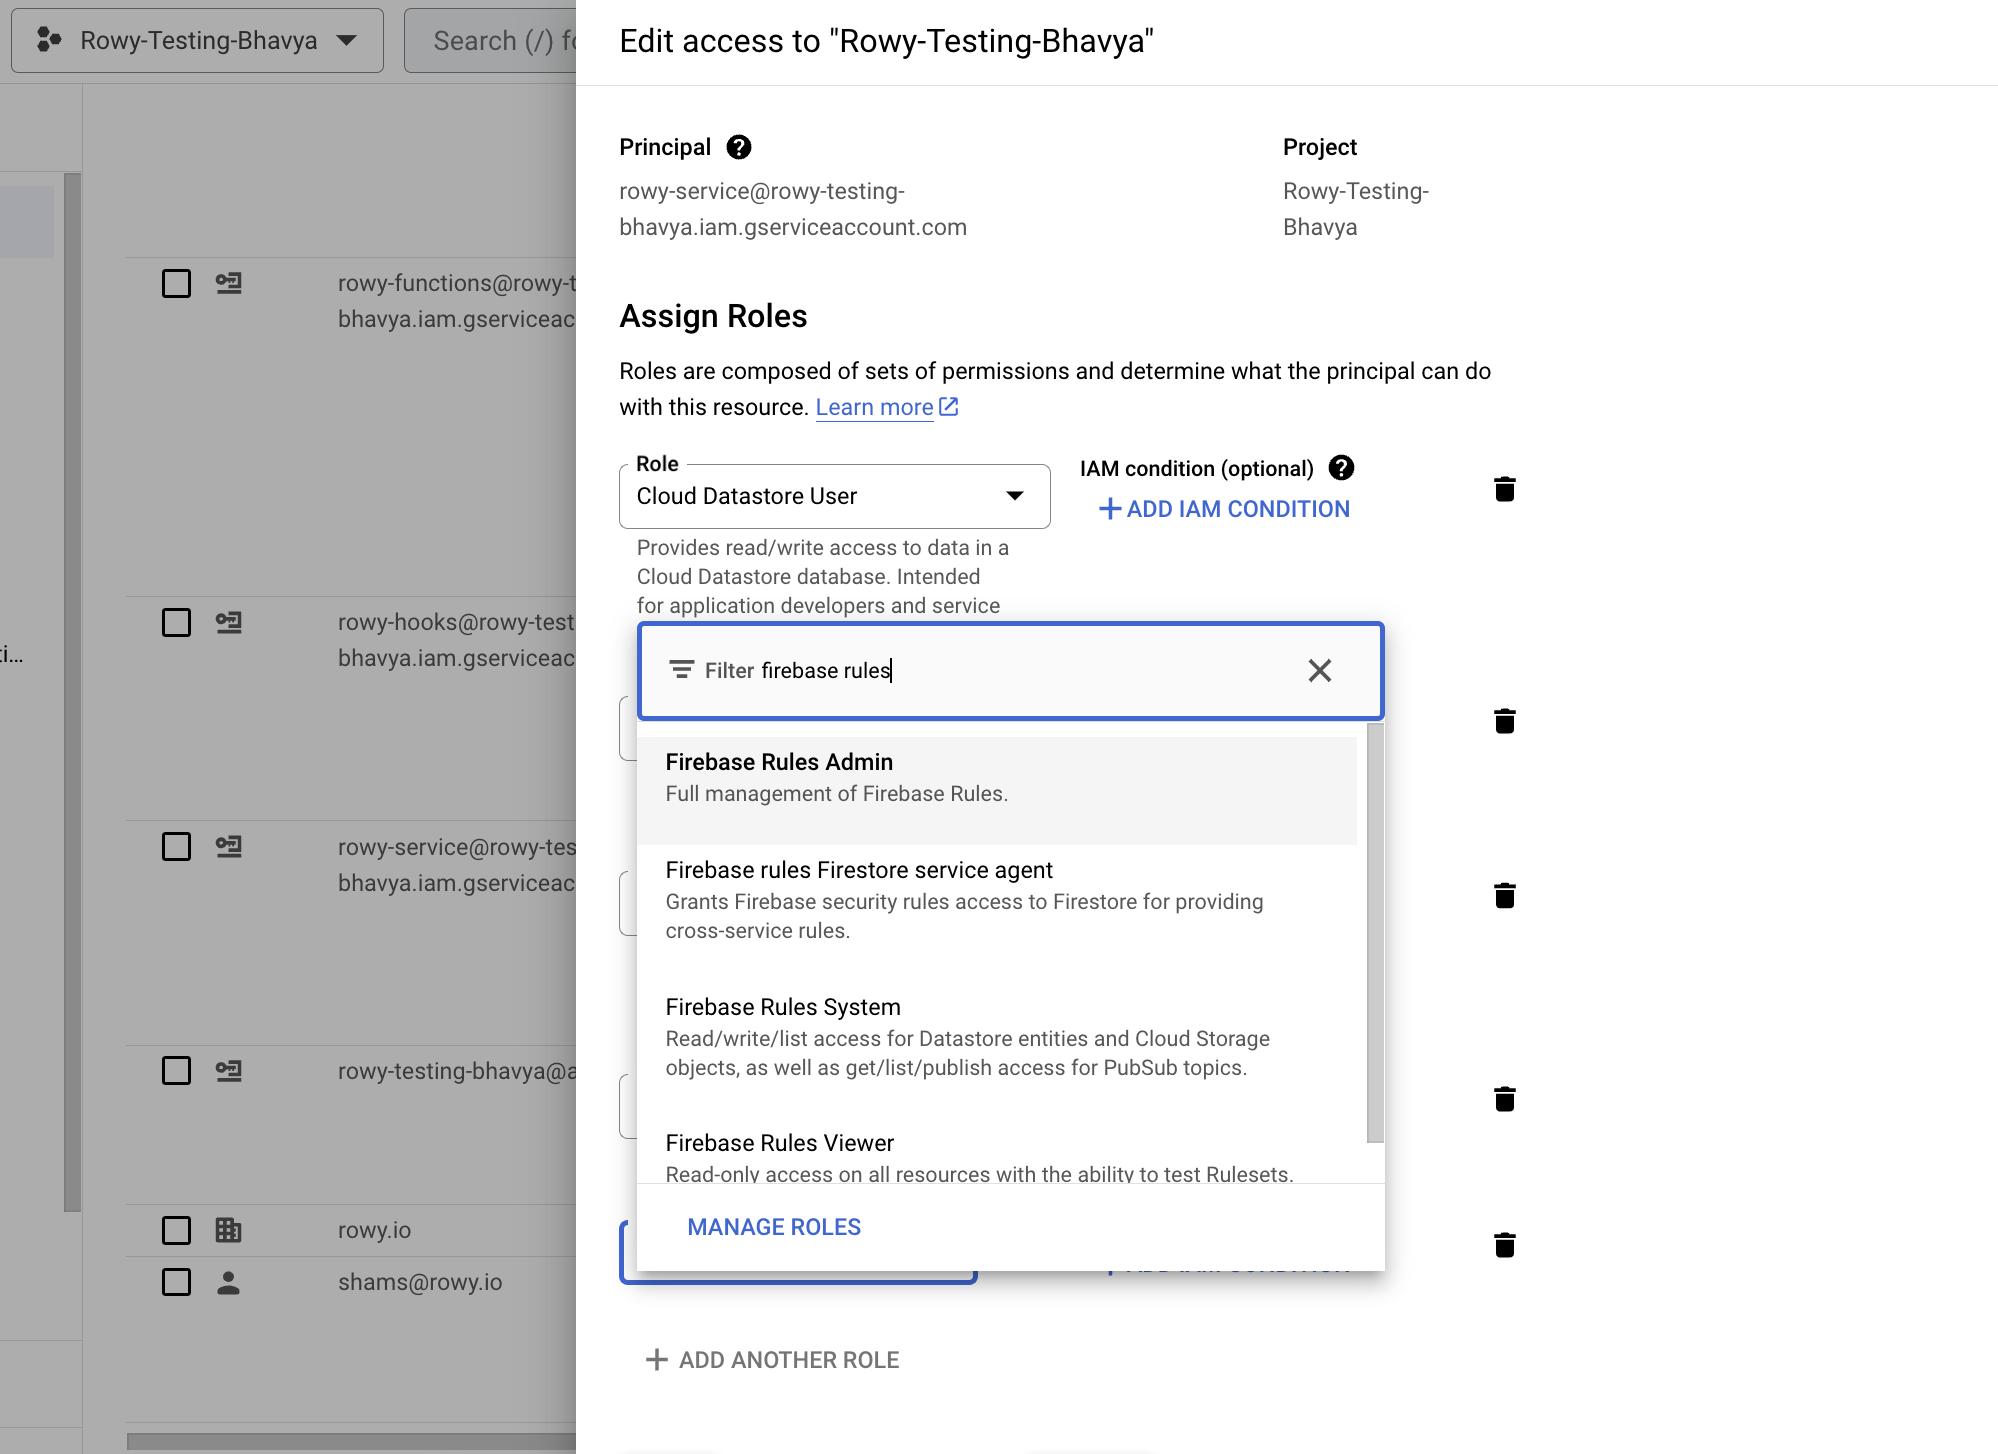
STEP 4: Click on the Save button to save the changes. You'll need to wait (30 secs to 1 min) for the changes to take effect.
Voila! You're all set to use the automated roles in your table. 🚀
Assigning Automated Roles
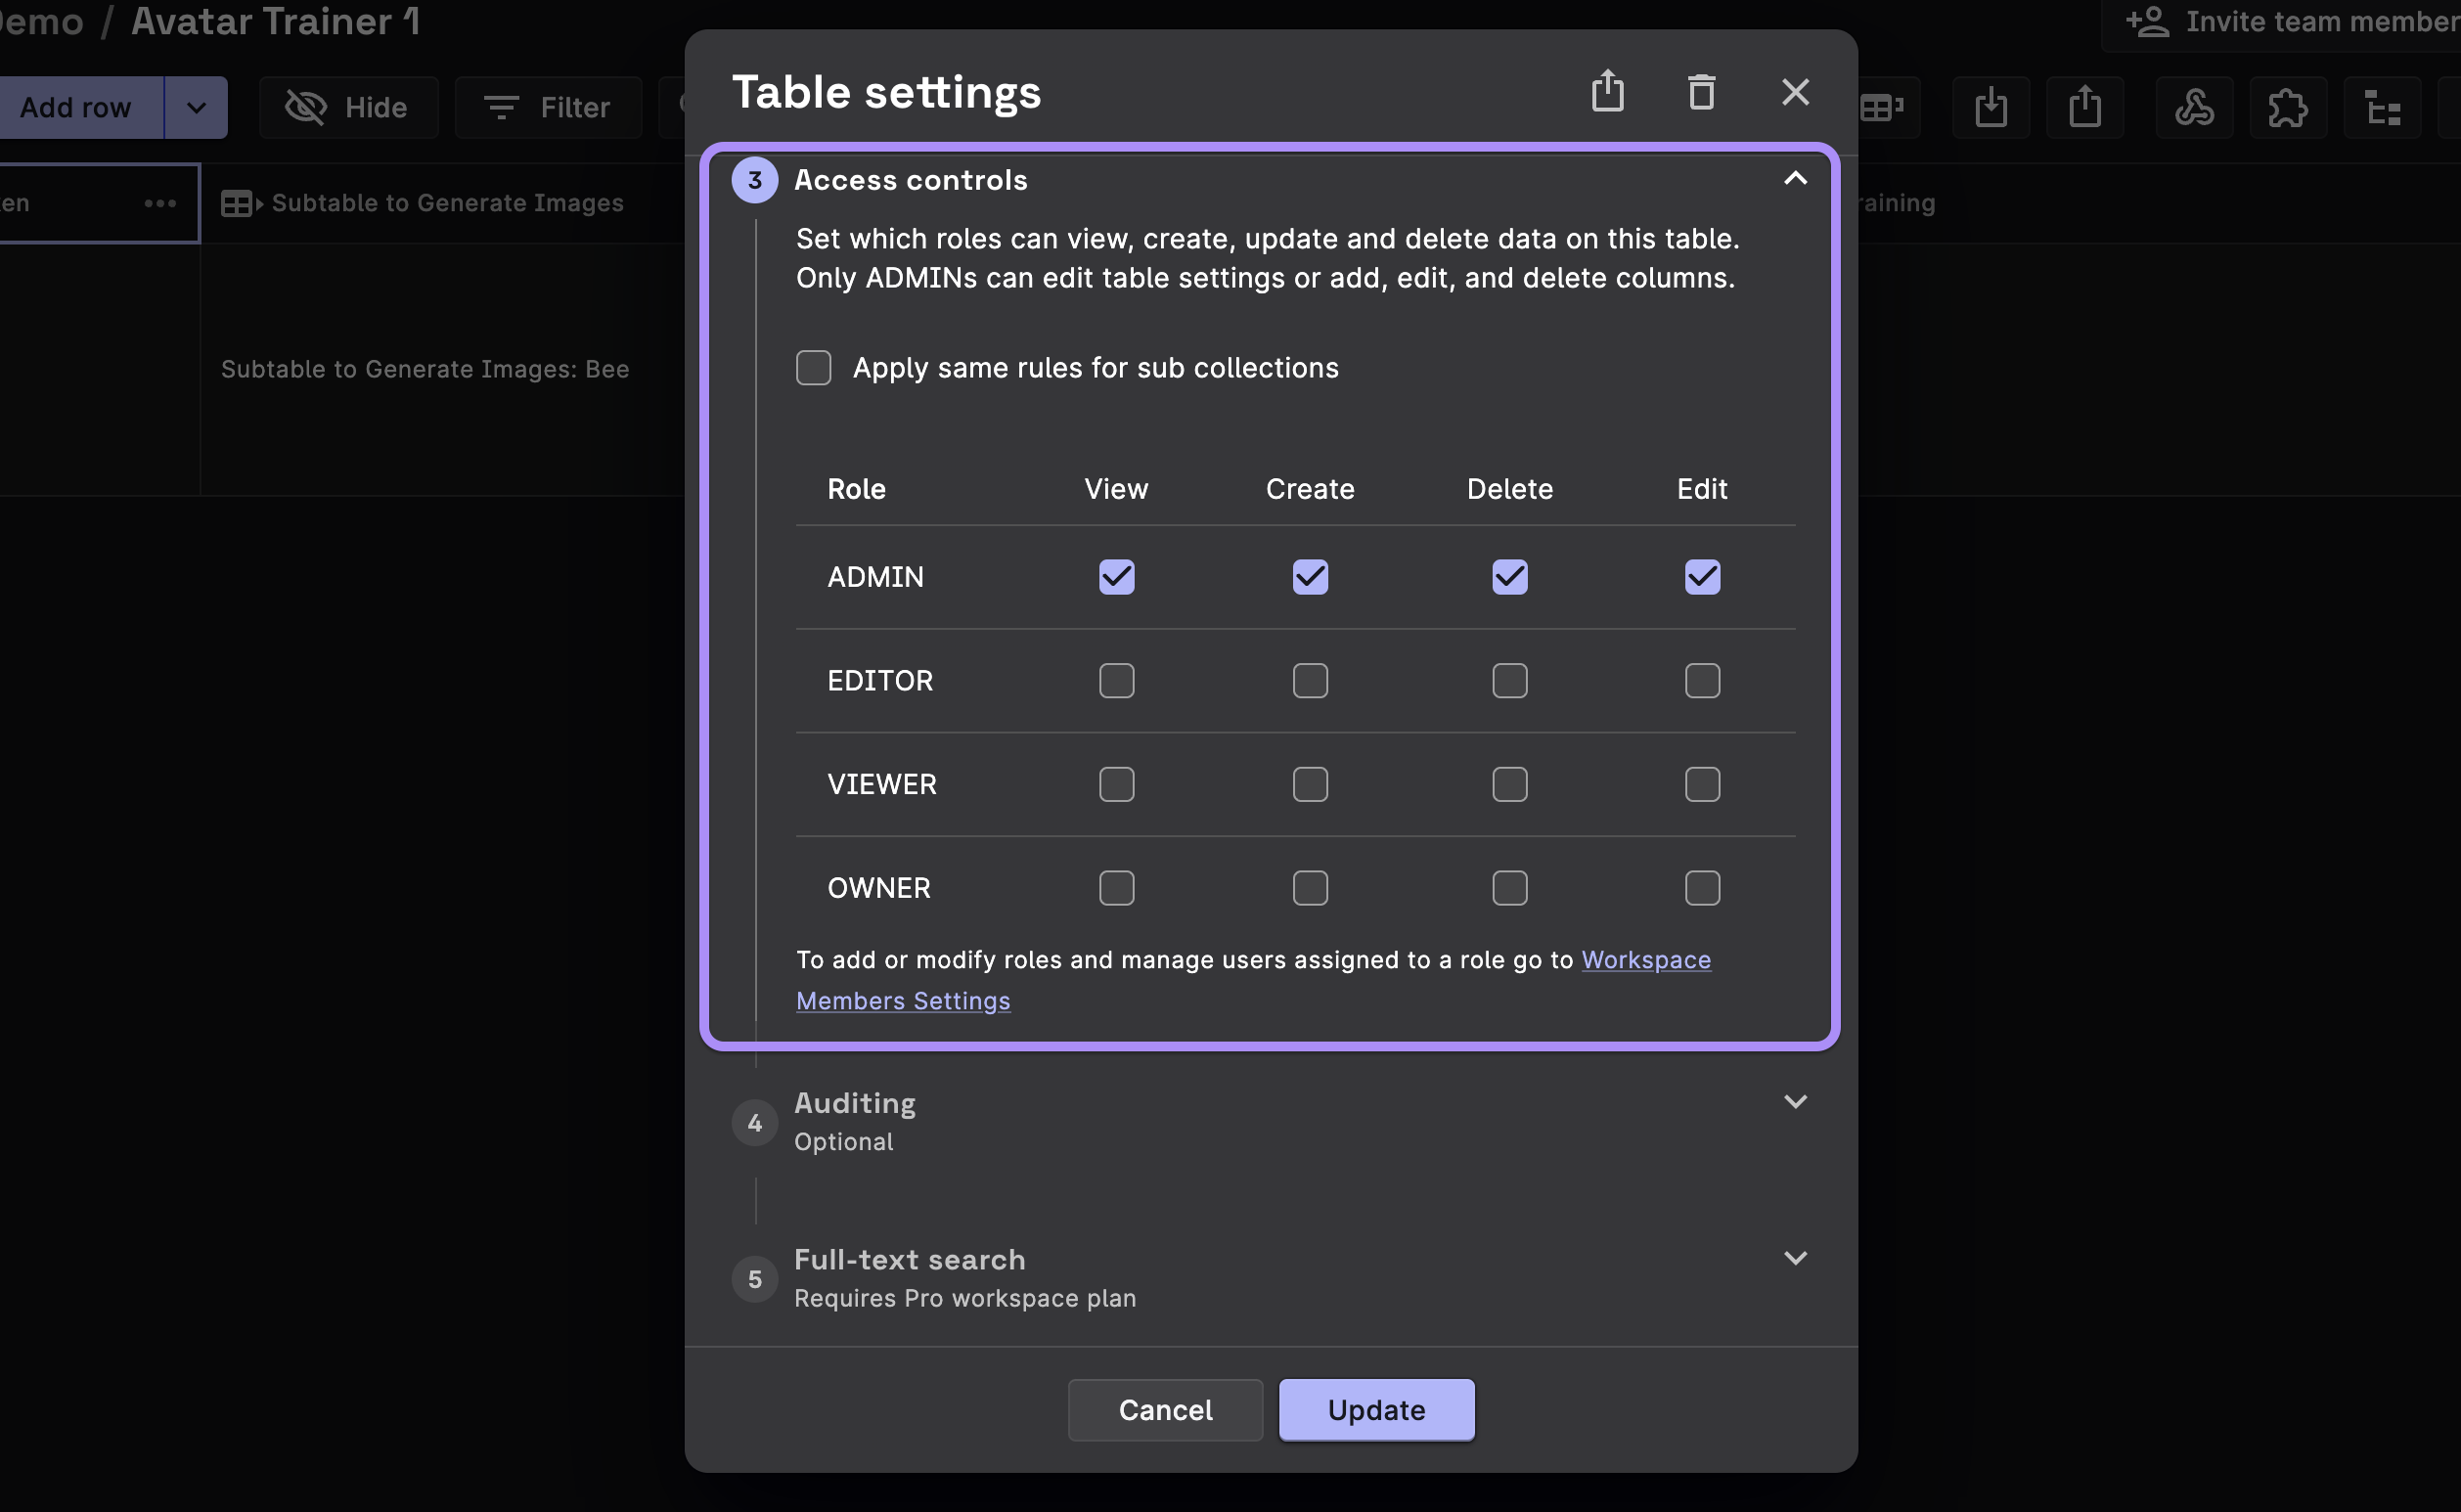
Once you've enabled the automated roles, you can assign them to your users in the Access Control section of your Table Settings.
The Access Control allows the following permissions for each role:
- View - Allows the Role to read the data in the table.
- Create - Allows the Role to create new records in the table. (Adding a new row)
- Delete - Allows the Role to delete the data in the table. (Removing row from the table)
- Edit - Allows the Role to update the data in the table. (Changing a value in the row)
NOTE
The ADMIN and OWNER roles are automatically assigned to the users who have access to the table. You can't change the permissions for these roles.
Example
Let us take an example to understand how we can set up these automated roles.
EXAMPLE: Let's set the following automated roles for our table.
We need the ADMIN and OWNER role to be able to perform all the actions in the table by default, i.e View, Create, Delete and Edit.
The EDITOR role to be able to perform the View, Create, and Edit actions in the table.
The VIEWER role to be able to perform the View action in the table.
Our table rules would look like this:
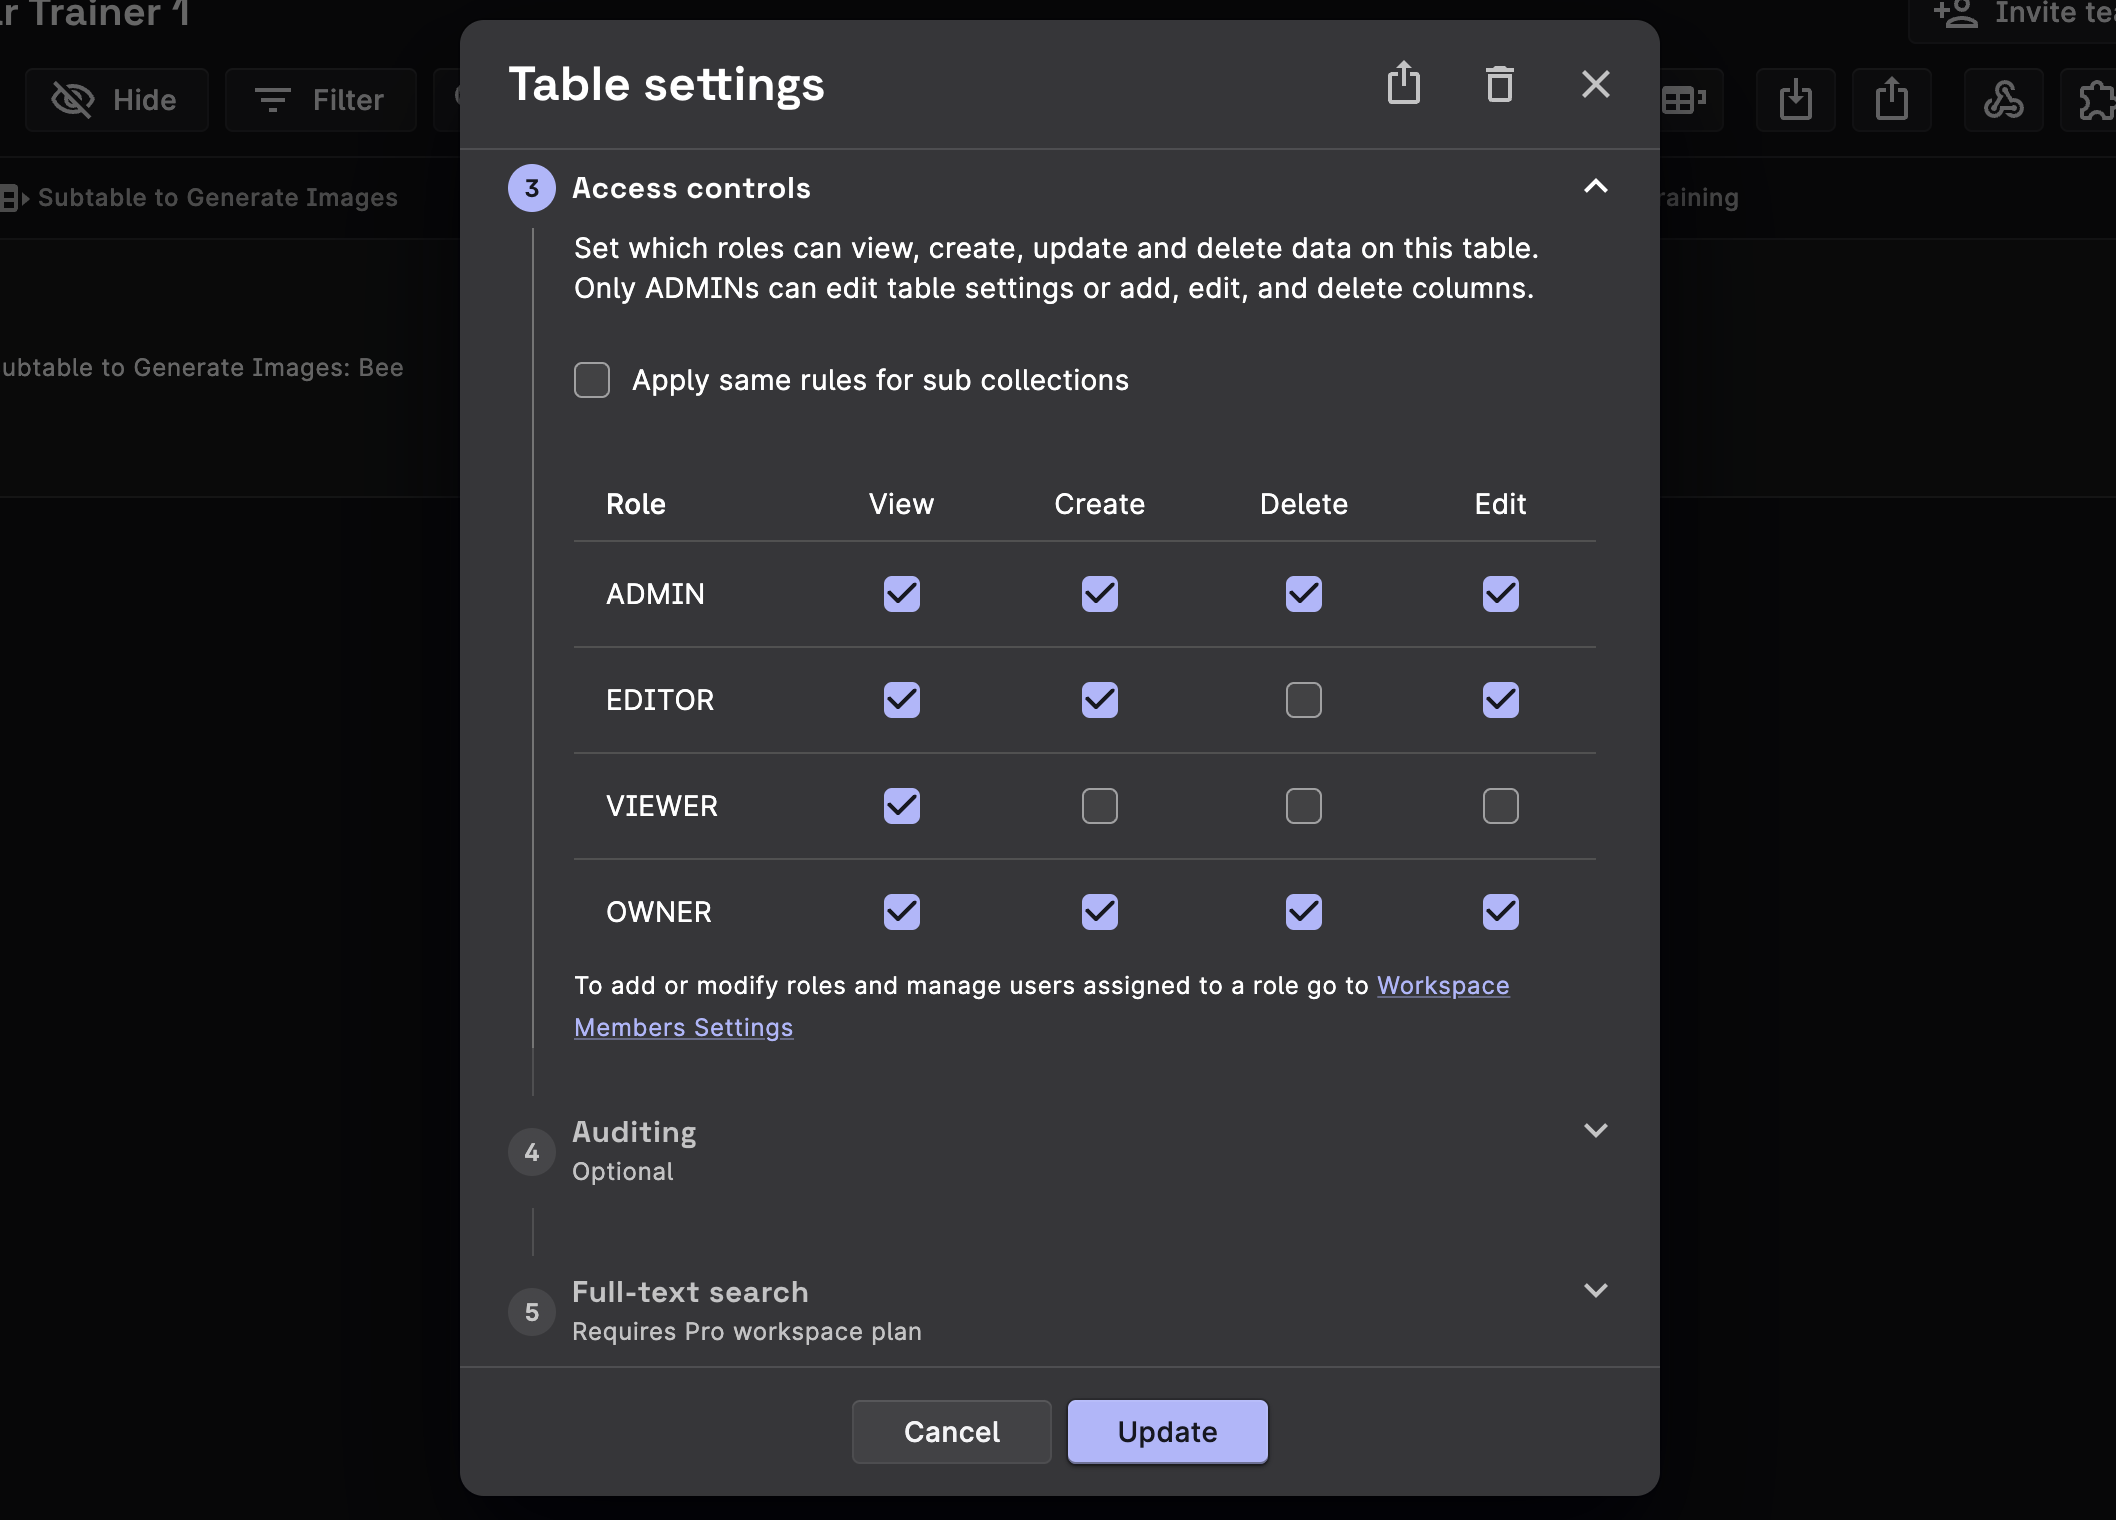
- Click on Update.
No Need to update the rules manually
There is no need to go to the Firebase console to update the rules. Rowy will automatically update the rules for you.