Setup for FlutterFlow
Let's set up Rowy and FlutterFlow to build a full stack application.
To build an end-to-end full stack application, we need to integrate both frontend and backend. The client uses the frontend of the application to communicate with the backend logic.
In today’s low-code/ no-code world, building full stack applications is as easy as dragging and dropping! 💪
We’d be using:
FlutterFlow: As the frontend, to build beautiful UI and screens.
Rowy: As the backend, to build simple yet powerful logic for our app.
Setting up FlutterFlow with Firebase
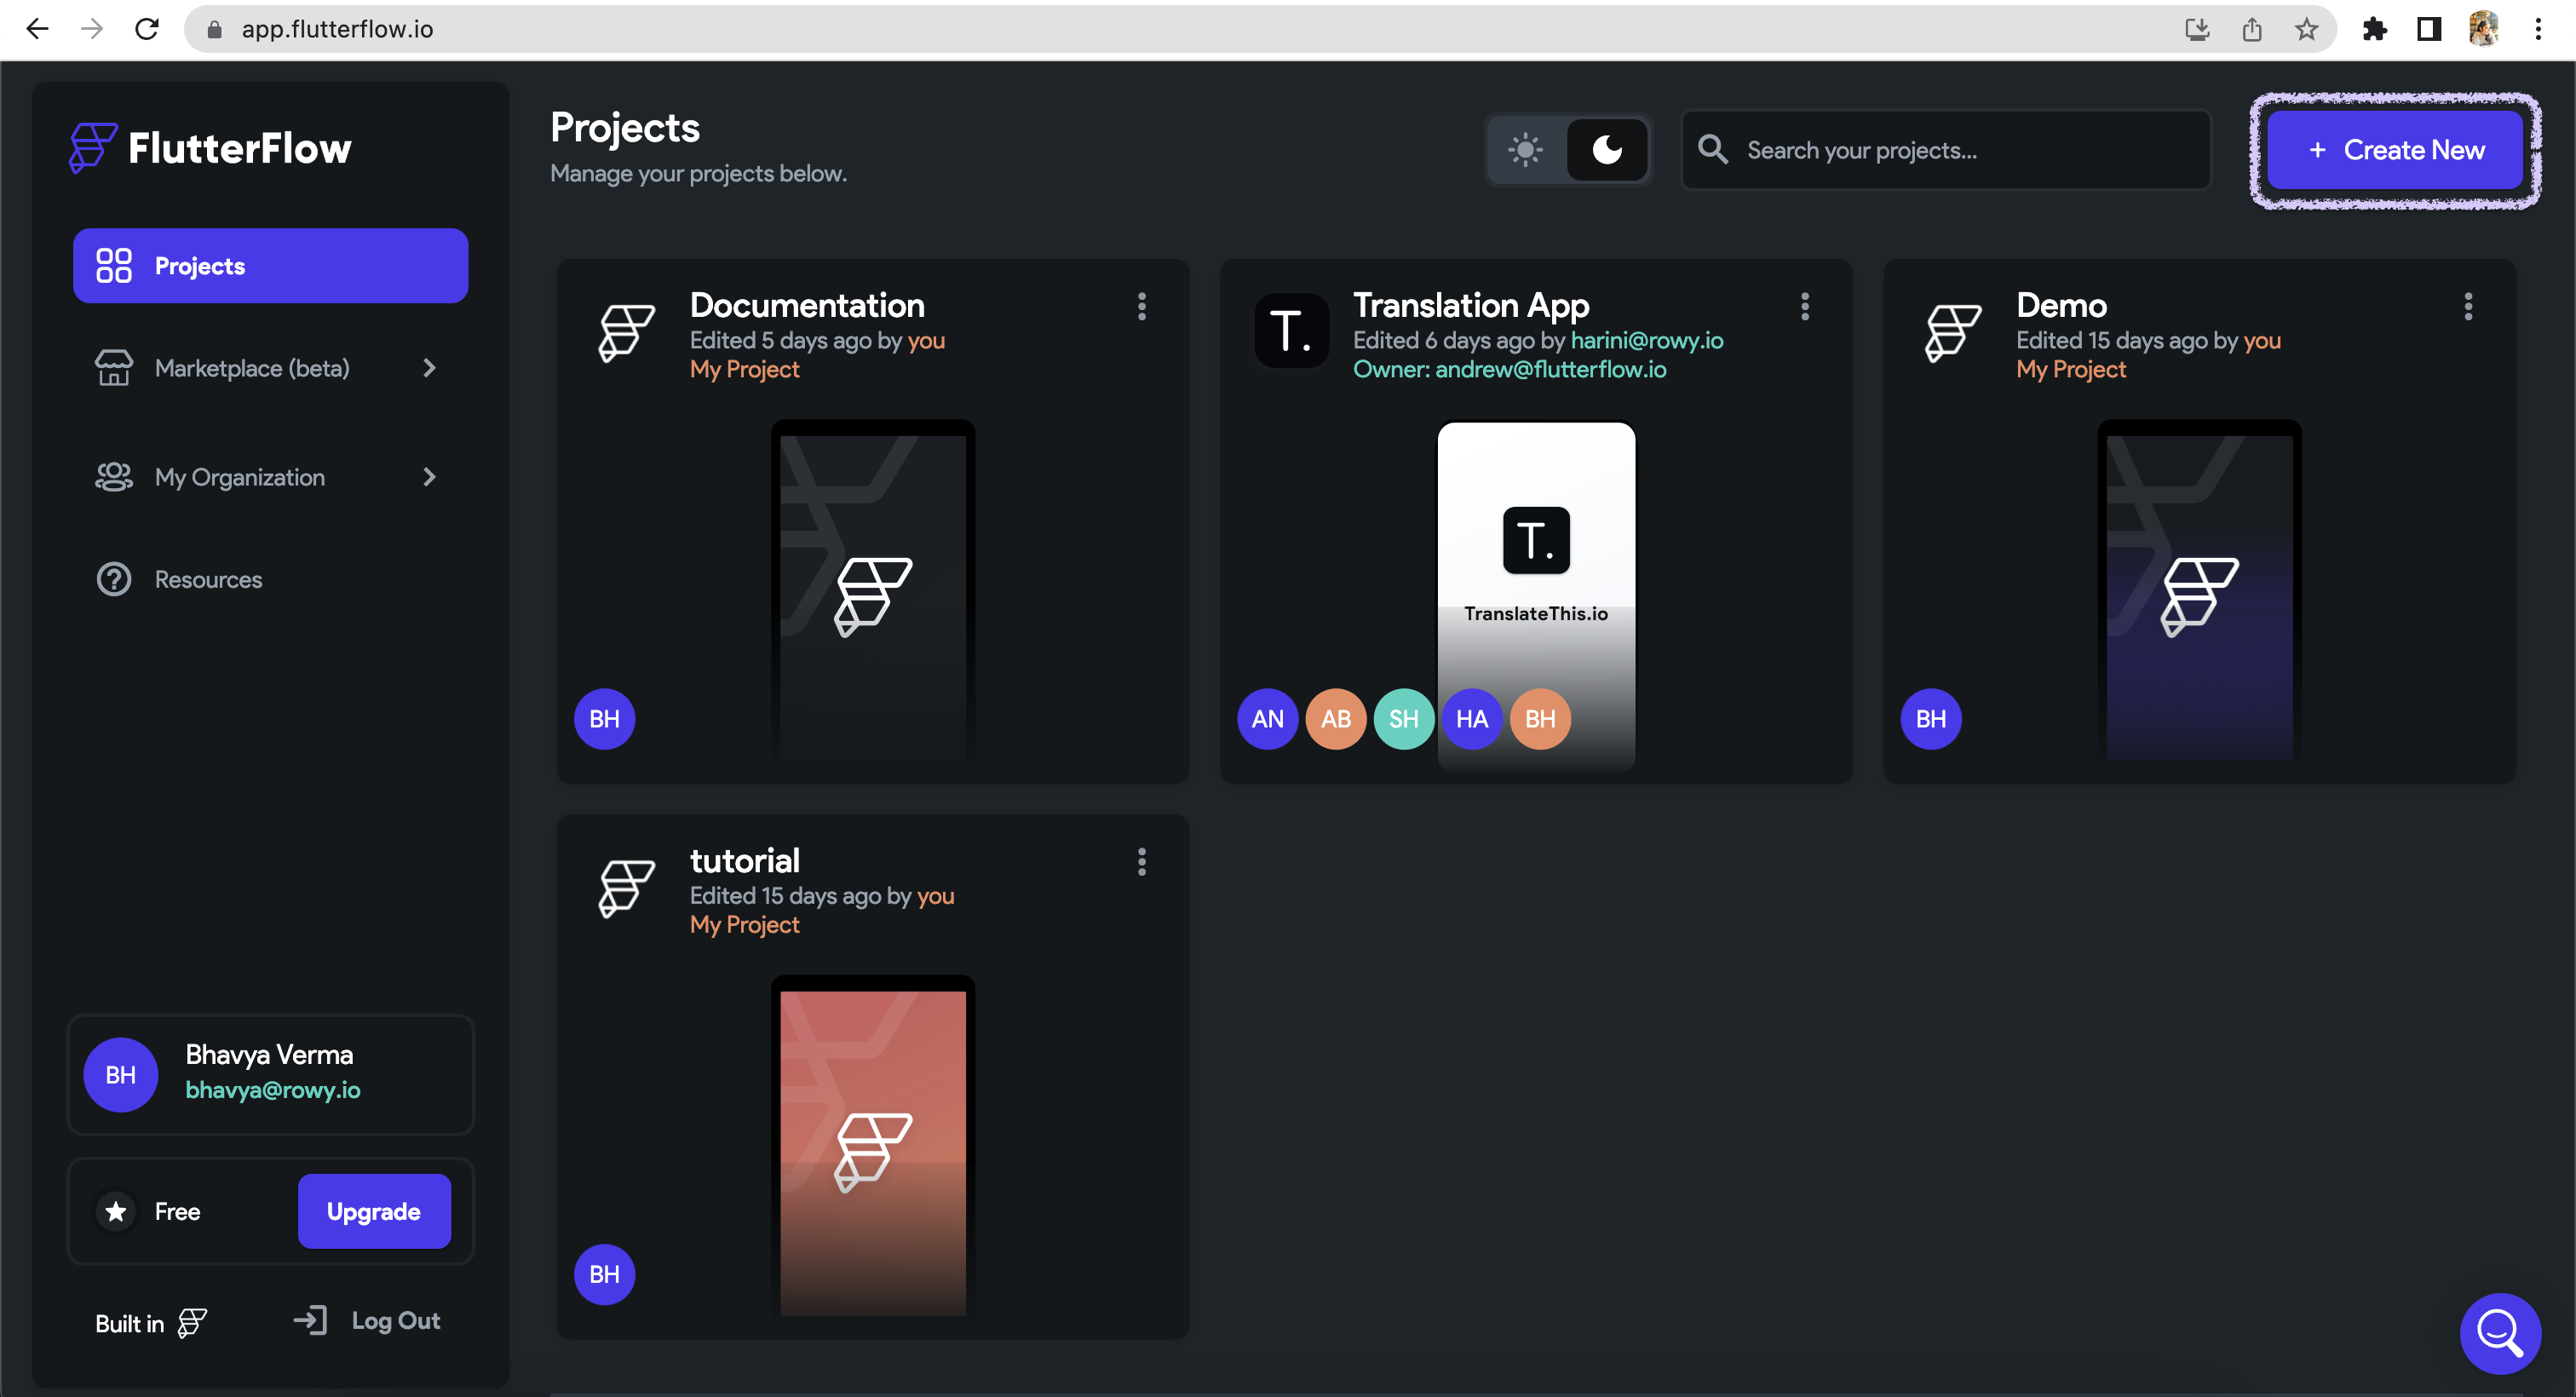
Let’s start by creating an account on FlutterFlow, if you already have one, sign in and create a new project.
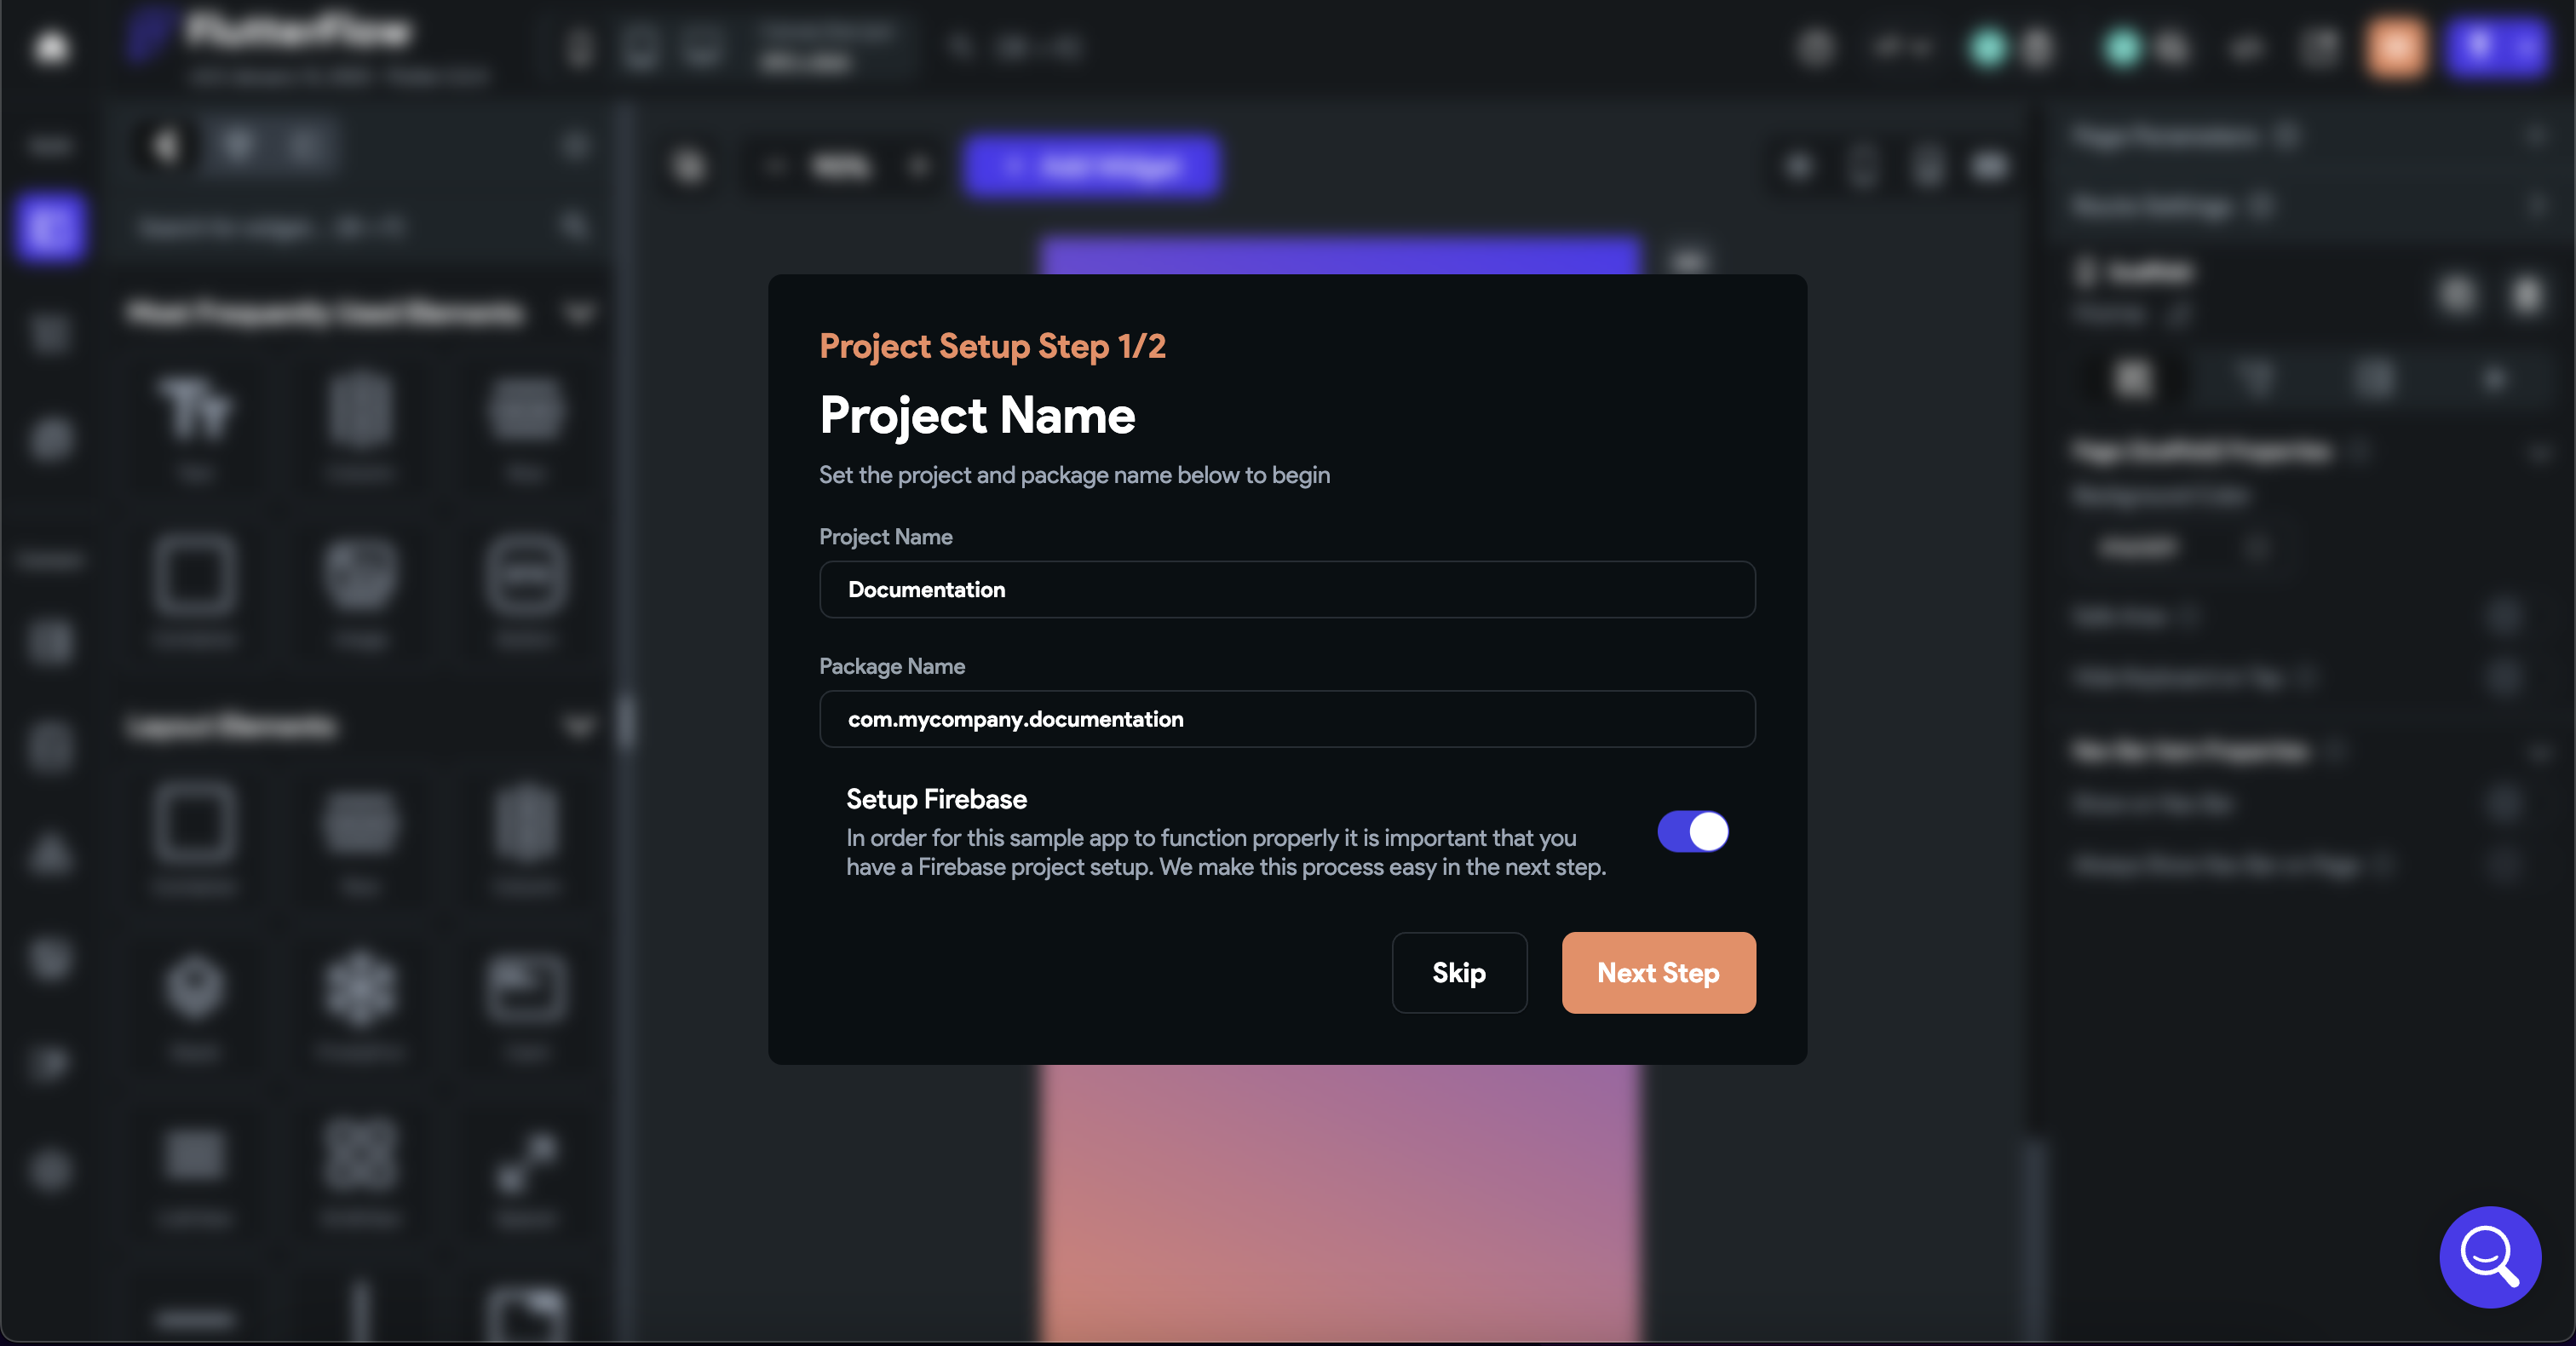
Project Setup Modal #1
Click on create a new app and give it a name.
You can change the Package Name as you like. (although it is optional)
Toggle the Setup Firebase button to integrate Firebase Setup for your FlutterFlow Application.
Click on the Next Step button.
Project Setup Modal #2
To retrieve your Firebase Project ID goto Firebase Console.
Sign in with your Google Account.
Select an existing project or Create a new Project. Follow the steps given below to set up your Firebase Project. (New Project or Existing)

Creating a new Firebase Project
Go to the Firebase console and sign in with your Google account.
Click on Add project.
Enter a Project Name, and click Continue.
You can enable Google Analytics for the project. If you want to enable Google Analytics, then you will be prompted to select a Google Analytics account on the next screen. (This is optional)
Click Create project. Once the project is completed, select Continue.
ENABLE FLUTTERFLOW ACCESS TO YOUR FIREBASE PROJECT
In the Firebase dashboard of your project, navigate to the far left menu. Select Project Settings → Users and Permissions.
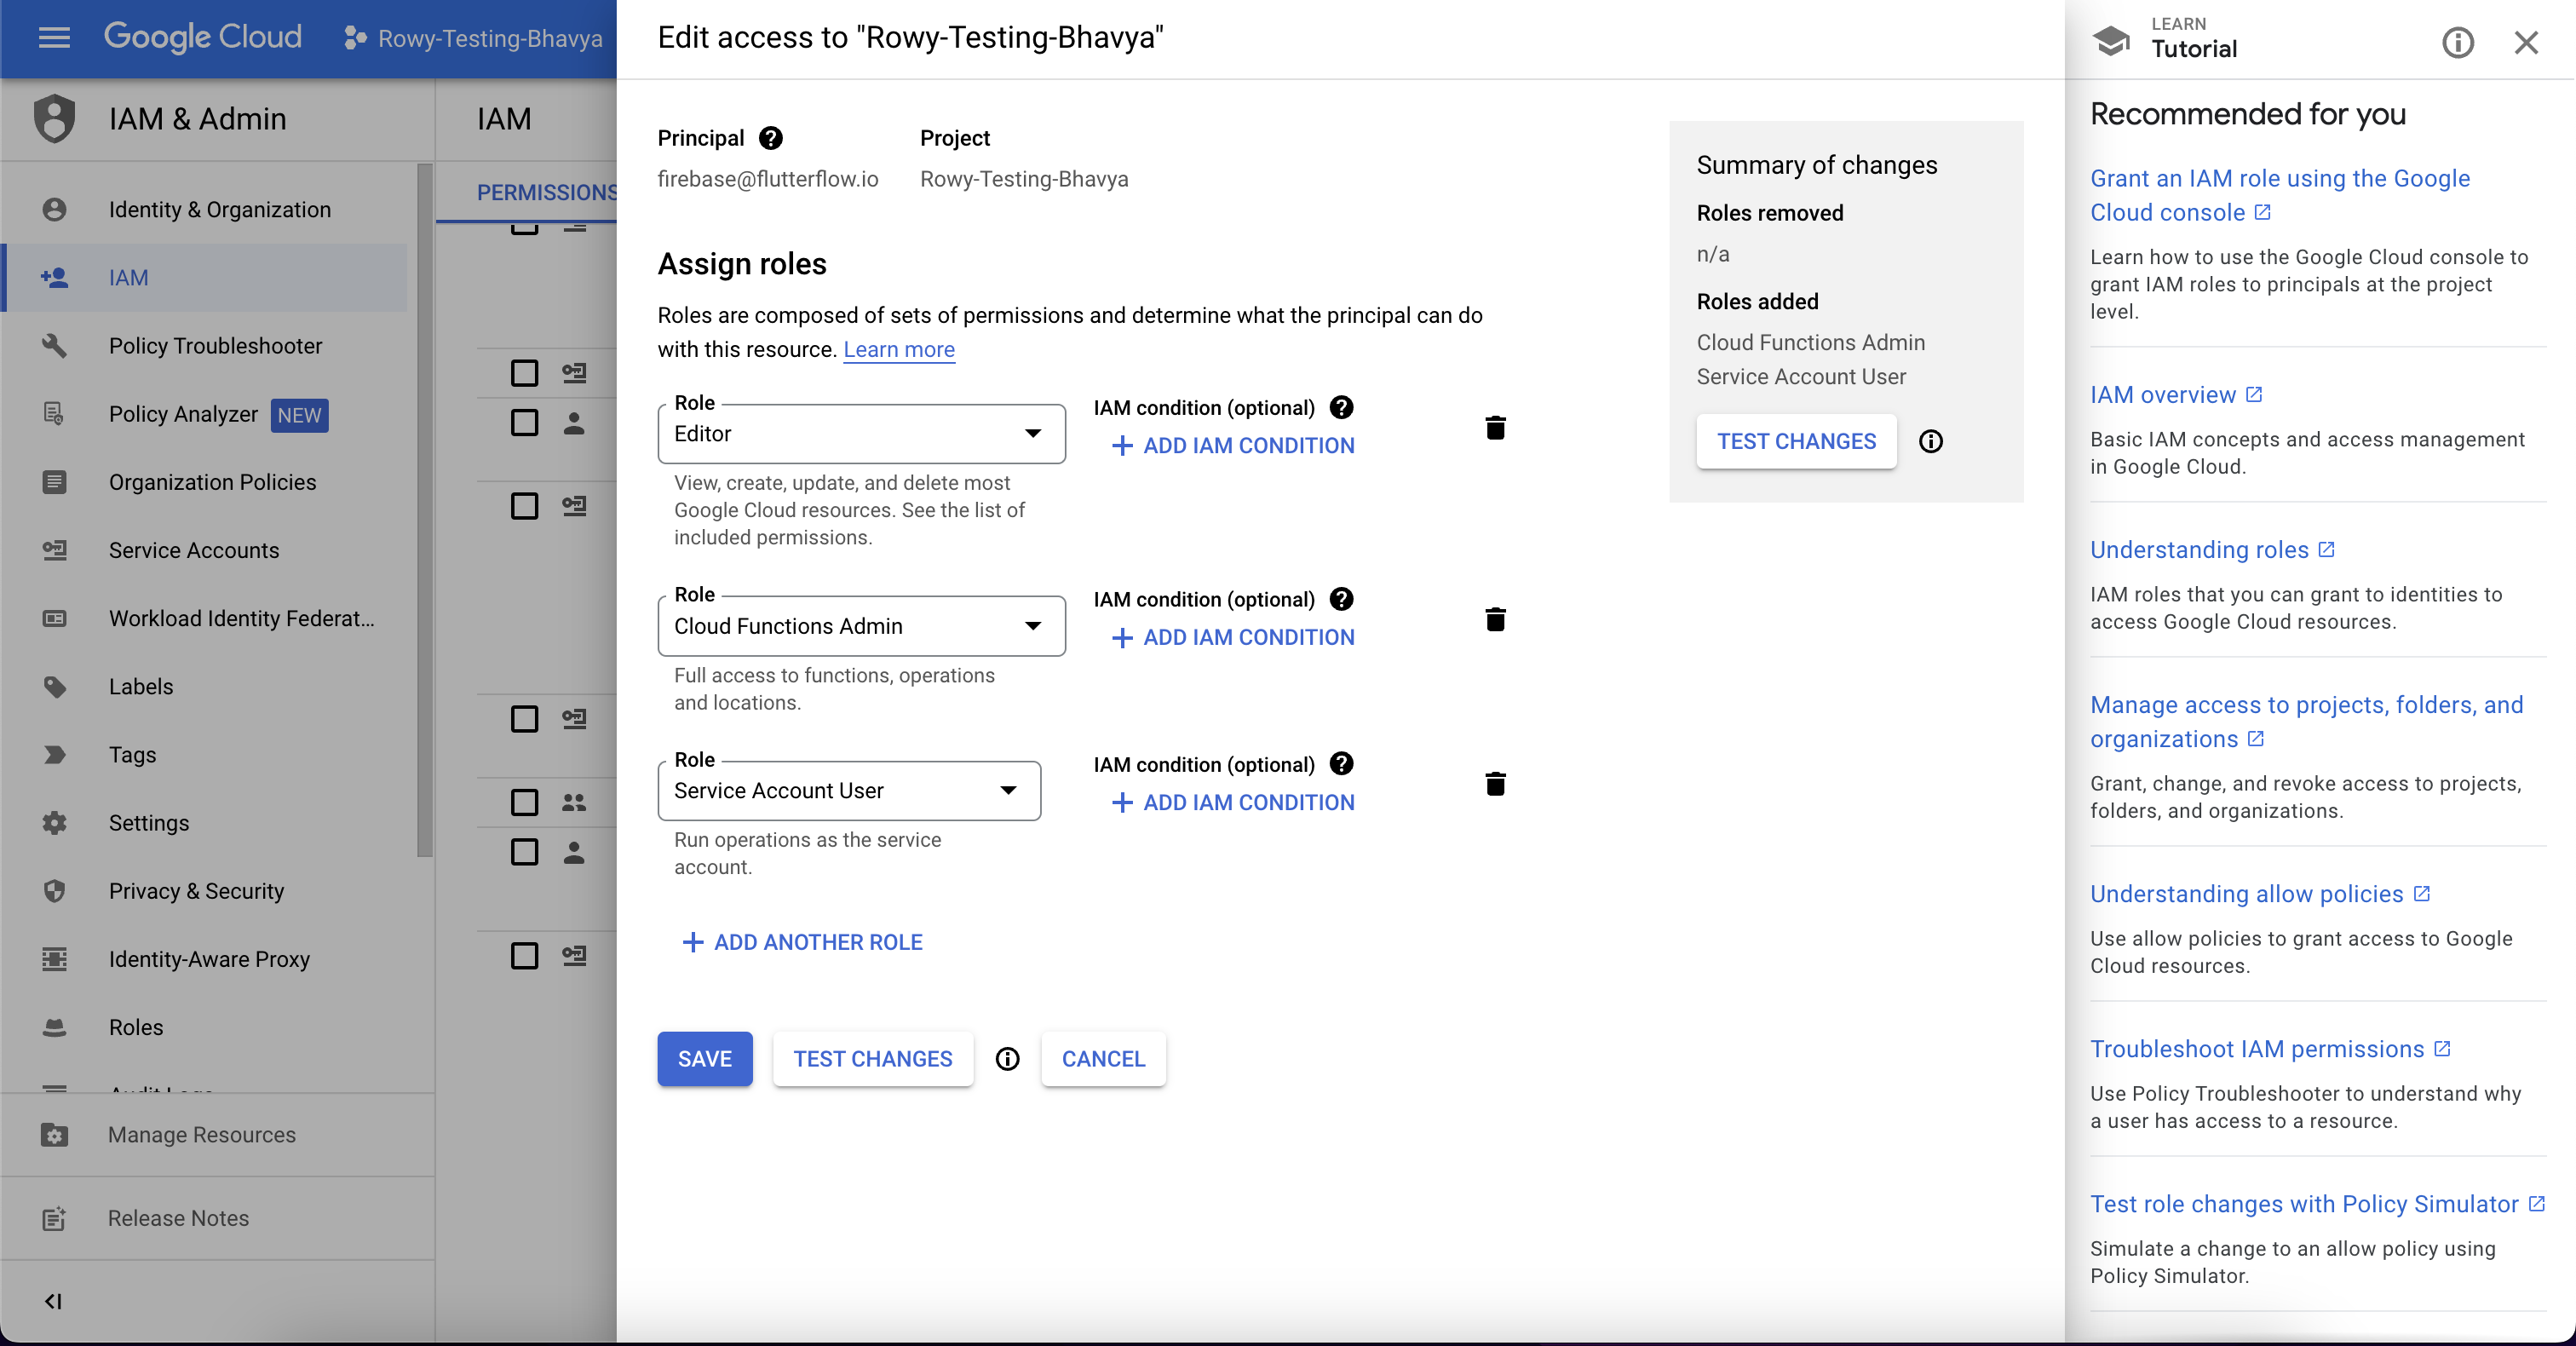
Select Add Member.
Add
firebase@flutterflow.ioas an "Editor" for your project and select Done. Then select Add Member.
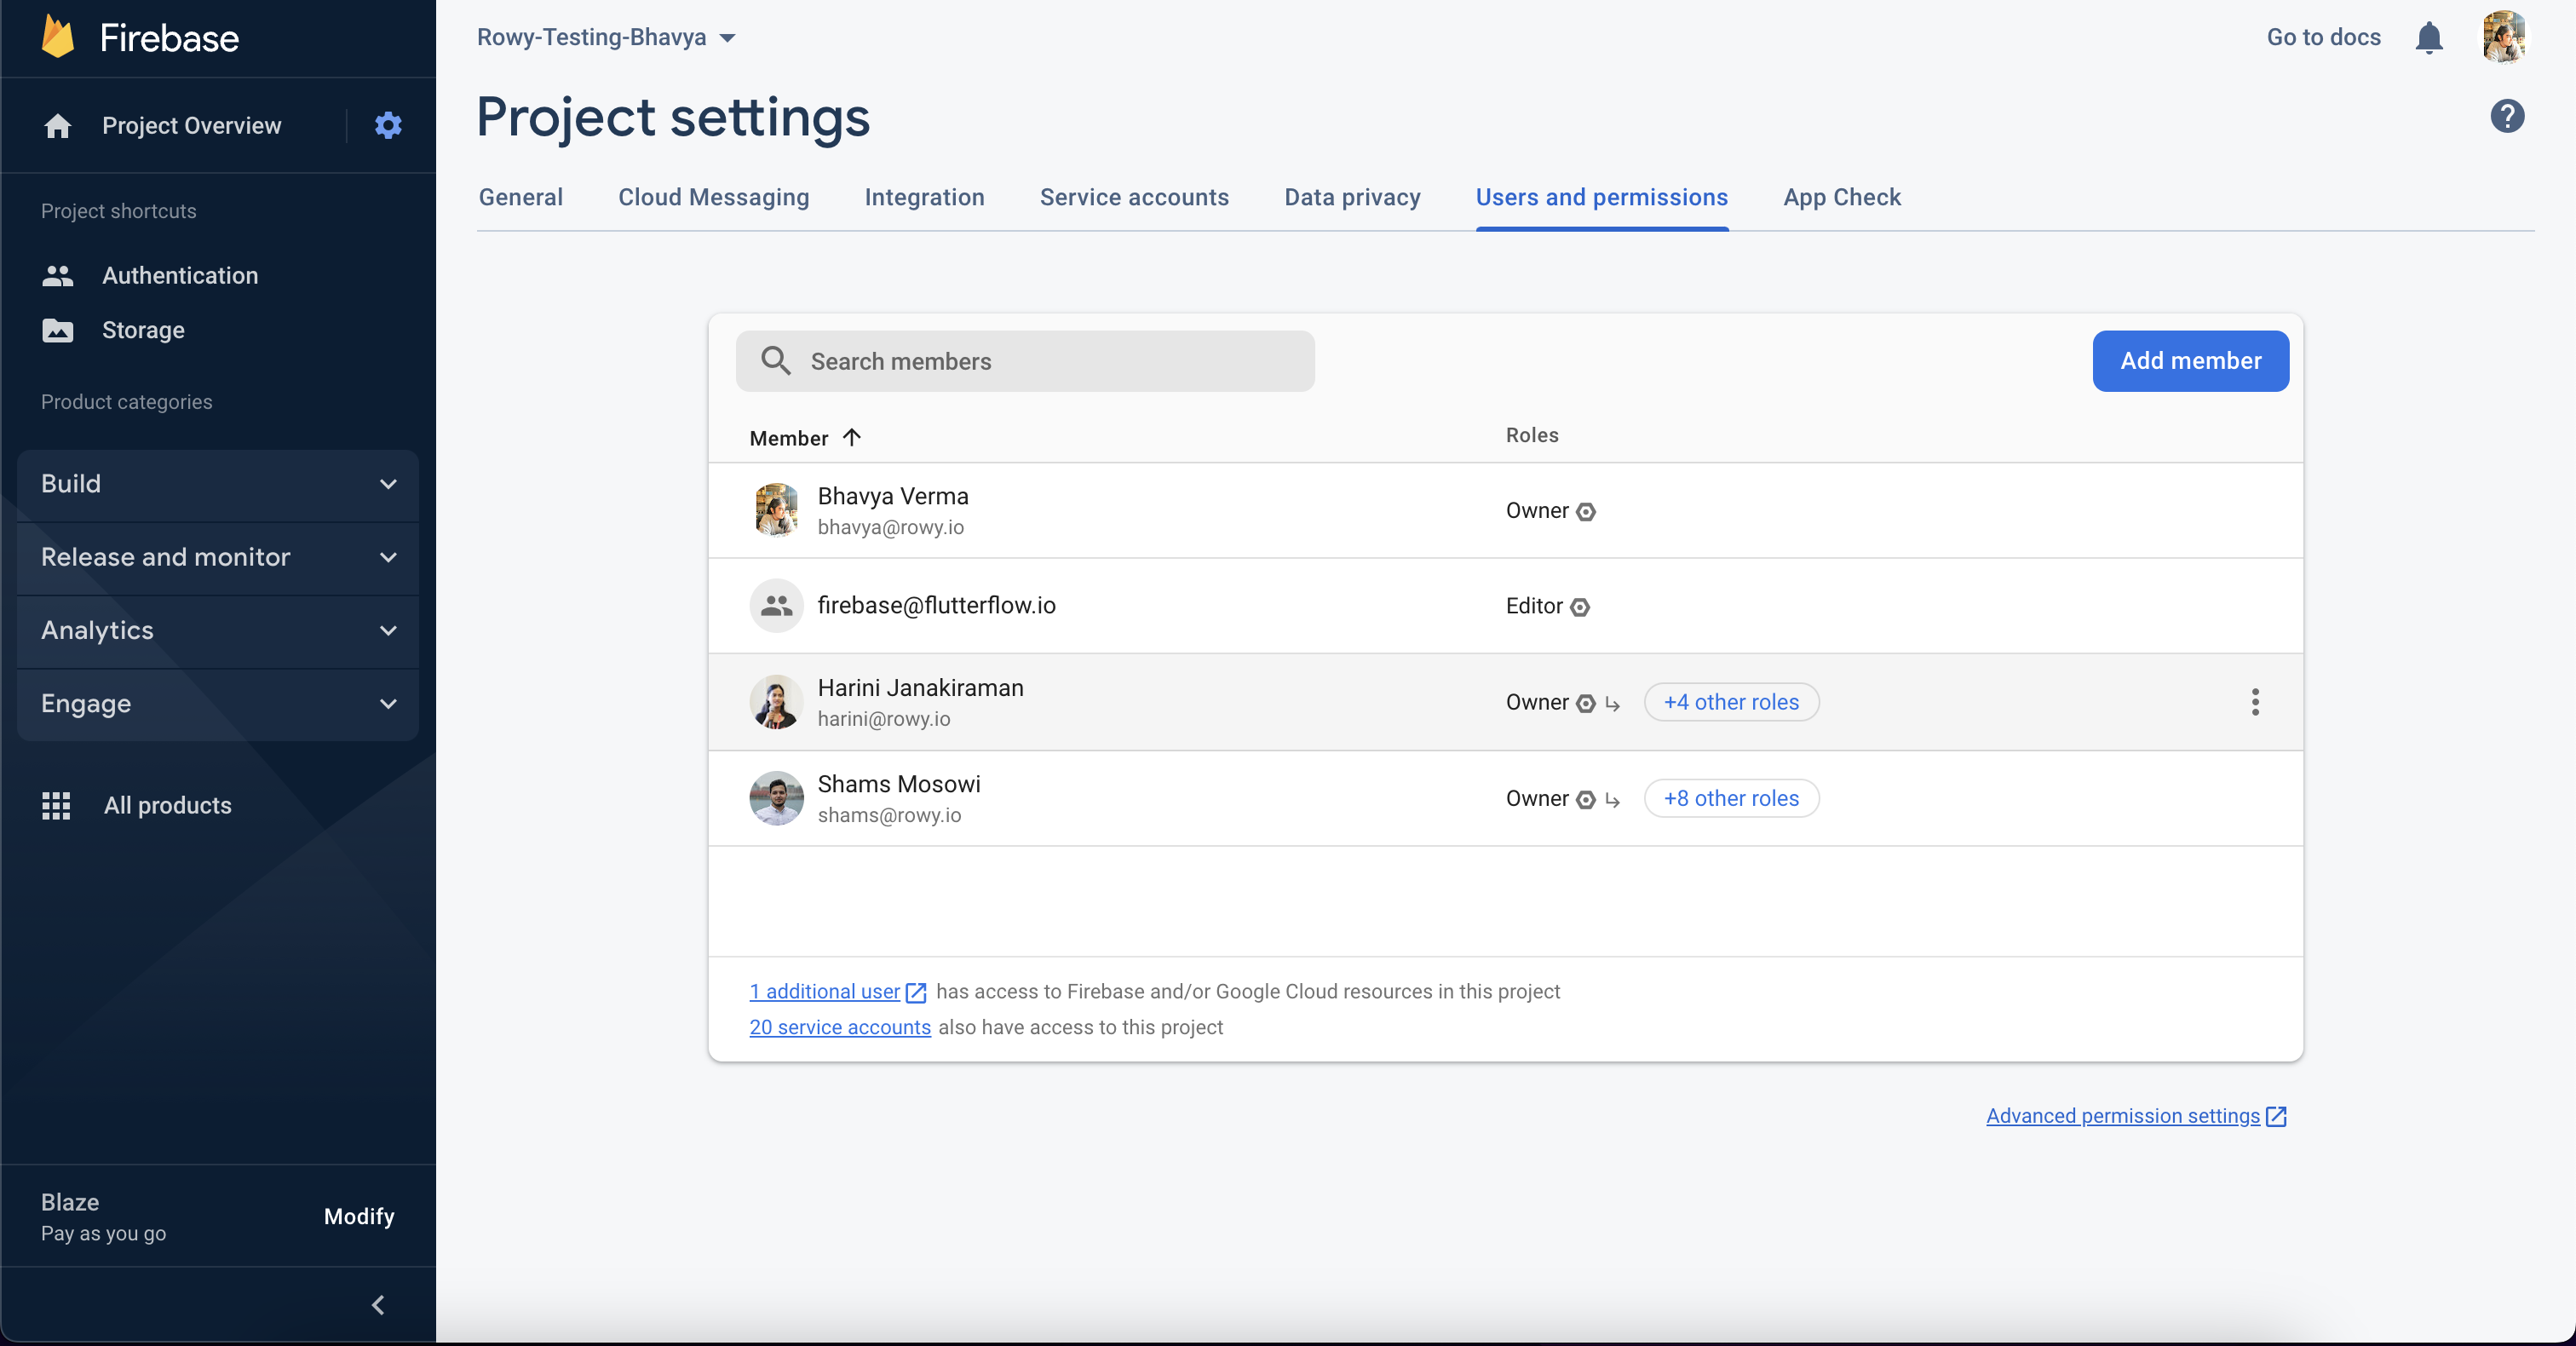
On the same page (i.e. Users and Permissions page), select Advanced Permission Settings (small blue text below the table). This will open the Google console (Google Cloud Platform) in a new browser window.
Find the row containing
firebase@flutterflow.ioand select Edit Member (pencil on the far right of the row).Select + Add Another Role.
Under Select A Role, search for
Cloud Functions Adminand select it.Under Select A Role, search for
Service Account User(you may need to scroll to find this) and select this as well.Select Save.
FlutterFlow Setup with Firebase
For more information regarding the FlutterFlow setup, please refer to the FlutterFlow Documentation.
CONFIGURING THE FIRESTORE DATABASE
Configuring the Firestore Database would help you create collections and add documents directly from FlutterFlow.
From the Firebase dashboard of your project, navigate to the far left menu. Select Firestore Database and then select Create Database.
Next, you will need to set your Firebase security rules. To get started quickly you can select Start in test mode and select Next.
Firestore security rules
Please see this link for additional information on Firestore security rules.
- Next, you will need to choose the location where your Firestore data will be stored. From the dropdown, select a location and then select Enable.
Firestore locations
Please see this link for additional information on Firebase locations.
ENABLE BILLING (REQUIRED FOR ROWY RUN)
Before starting, make sure you have your Google Cloud or Firebase project with Firestore and Firebase Authentication enabled, and upgraded to the Blaze Plan.
You can upgrade to the Blaze pricing plan in the Firebase console. A Cloud Billing account is essentially being added to the your Google Cloud project when you upgrade to the Blaze pricing plan.
Login to your Firebase Console. On the lower left corner, your project will be listed to be on the Spark Plan. Click on the Upgrade button.
Select the Blaze Plan and click on the Upgrade button.
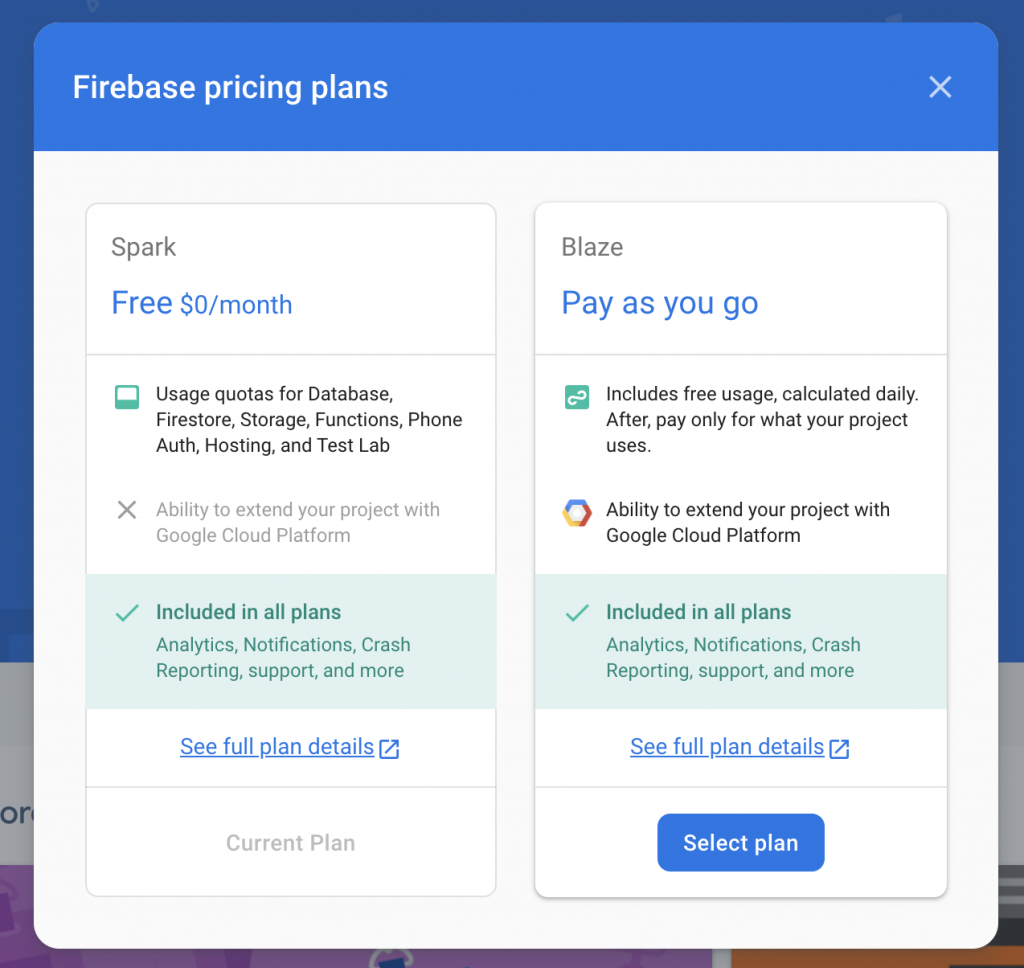
Select a billing account. Then click Continue and Purchase. You are now on the Blaze plan.
Firebase Billing Instructions
For more information on setting up the billing account, check out the Google Billing Instructions here.
COPY PROJECT ID TO FLUTTERFLOW
Now, from your project in the Firebase Console, navigate to the far left menu. Click on the settings icon next to the Project Overview. Select the Project Settings.
Under the Project Settings, copy the Project ID.

- Return to the FlutterFlow Screen and paste the Project ID. Click on Connect.

GENERATING CONFIG FILES
- In FlutterFlow, click on Auto Generate Config Files.
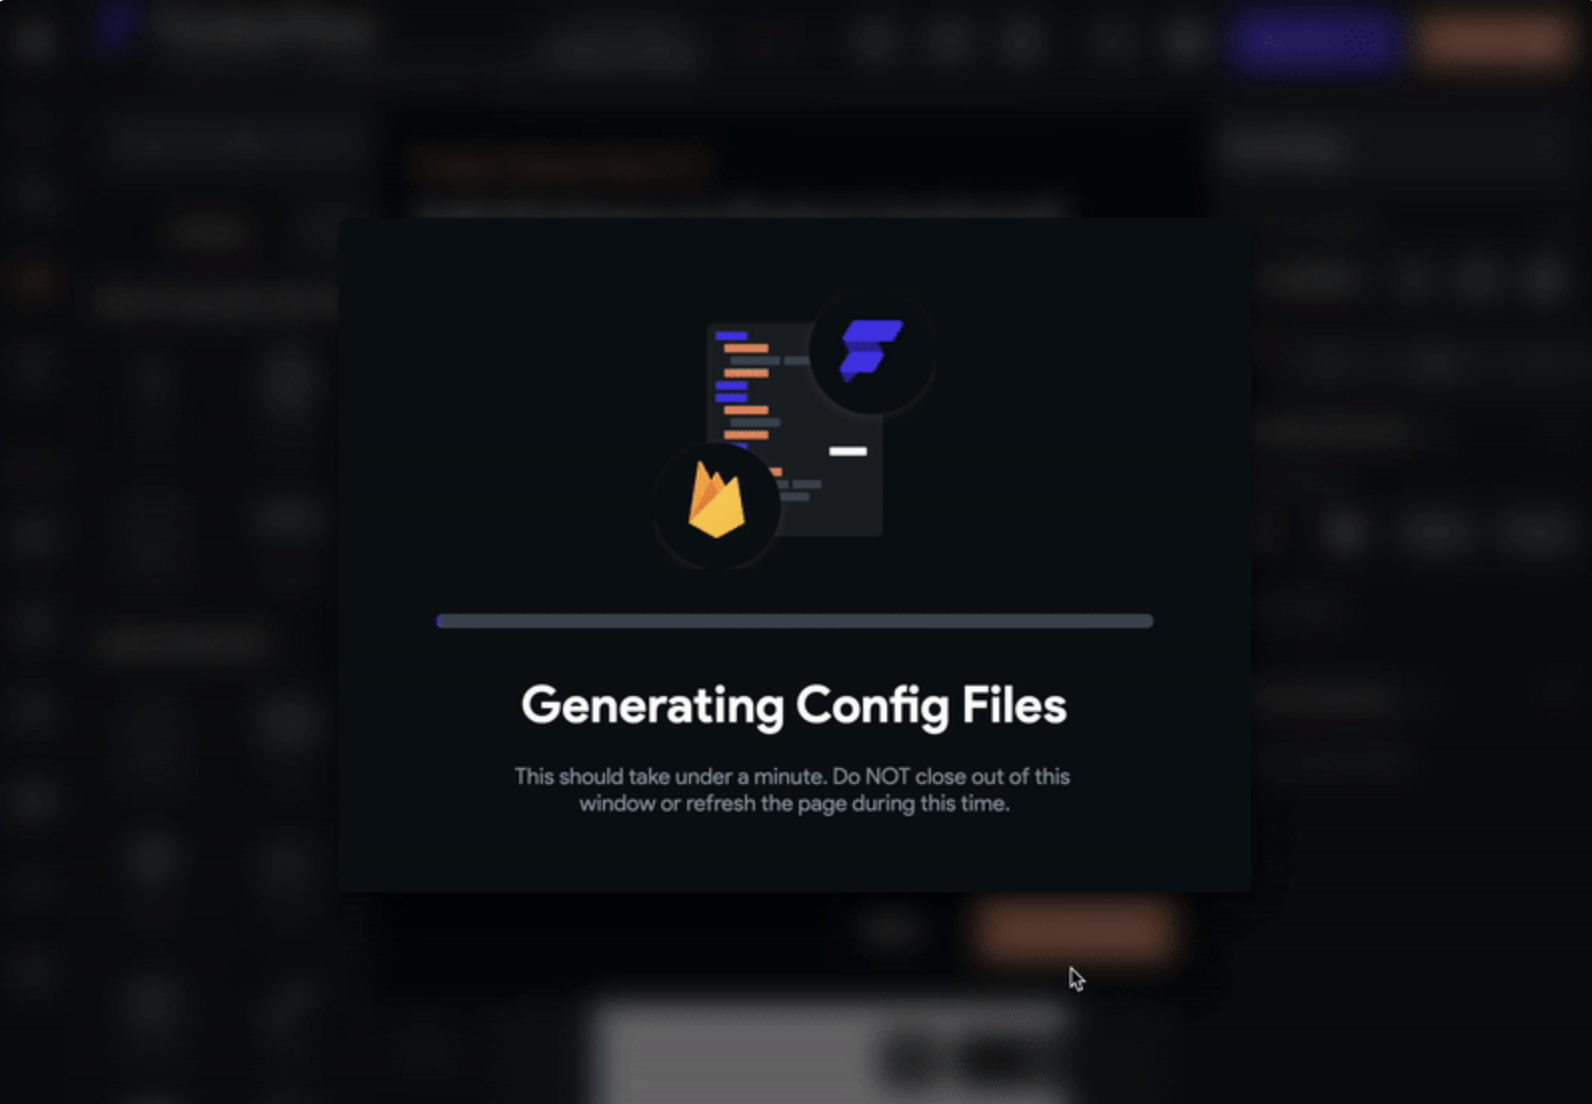
For Existing FlutterFlow Projects
If you have already created a project in FlutterFlow, Go to the Settings & Integrations > Project Setup > Firebase, make sure you have pasted the project ID and then click on Auto Generate Config Files.
FINISHING THE SETUP
Turn on the Enable Authentication to allow users to log into your app using Firebase Authentication. Please note this step only enables Authentication. You will need to complete an additional setup using these instructions.
Turn on Create User Collection to Automatically add a users collection to Firestore Database. This collection will be used to store logged-in user's details such as email and password.
Select Initial Pages allows you to define the first page a user sees when they open the app and the first page they see after logging in. When you click Unset you will be able to choose from a list of templates. You can change these pages at any time inside the App Details page.
Click on Start Building.
Setting up with an existing FlutterFlow Project
Follow the same steps as in “Creating a new Firebase Project” from enabling FlutterFlow access to the project.
The final step is connecting and autogenerating the config files.
To connect and autogenerate files:
From the Firebase dashboard from your project, navigate to the far left menu. Select Project Settings.
Under Your Project, look for Project ID. Right-click and copy it.
Return to FlutterFlow. From the Navigation Bar, select Settings & Integrations > Project Setup > Firebase.
Add your Firebase Project ID and click Connect. A green check ✅ will appear once this is complete.
Under Config Files, select Autogenerate Files and then select Generate Files.
Setting up Rowy with Firebase
The Rowy setup is super quick and simple. Follow the steps below, or watch this simple video to get started.
Go to Rowy and Sign Up if haven’t already. If you already have a Rowy Account, click on Sign In.
Creating a Workspace
To create a workspace, follow the steps below, or visit our docs:
After creating an account, the user will be redirected to the Create Workspace page.
Click on the Create Workspace Button.
Set the name of the workspace and the user role on the pop-up modal.
Click on the Next button.
Enter any prompted information and click Next.
Multiple Workspaces
Currently, Rowy supports only one workspace in the BASE free plan. Support for multiple projects is under the PRO plan. You can customize and manage your workspace in the Workspace Settings page.
Creating a Project
To create a workspace, follow the steps below, or visit our docs:
Go to the Rowy Workspace and click on the Create Project button.
Enter the name of the project and a data source to connect. Click on the Continue button.
Then, the user can then either create a new project or connect to an existing project using the dropdown.
Enable the Firestore Services and the Firebase Authentication Service by following the prompted steps.
Click on Verify to verify the connection and click Continue.
Other Database Support
Currently, Rowy supports only Firestore as a data source. PostgreSQL and MySQL will be supported in the future versions.