Slack bot
Using Rowy's low-code UI for Firebase, you can simply develop a cloud function that sends Slack messages whenever data in the Firestore collection updates.
Rowy provides ready-to-use code blocks, known as Extensions, for cloud functions. Extensions can be customized easily using JavaScript or TypeScript, in a built-in code editor.
What are Slack bots?
Slack is a business chat platform that links people to the information they require. Slack changes how businesses communicate by uniting employees to work as a single cohesive team.

A bot is a specific kind of Slack app made to converse with users. A bot can access the same set of APIs as a regular app and perform all the same tasks as a Slack app, just like a regular app.
Creating a Slack Bot from scratch
It is super simple to create a Slack Bot using Rowy's Slack extension, which provides a ready-to-use code block. It offers users the flexibility to either use the Extensions as it is or go down to the code level and implement their logic.
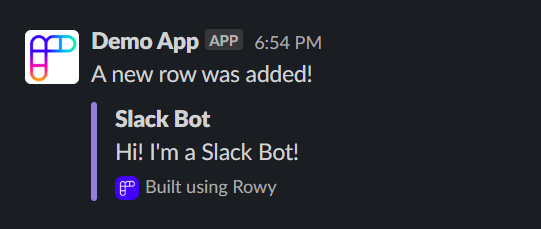
In this tutorial blog, we’ll create a Slack Bot that sends a message in a Slack Text Channel whenever a new row is added to your Rowy Project.
Prerequisites
A Rowy account with Rowy-Run set up (If not, you can quickly create one by following the instructions on https://rowy.app.)
A Slack Account (Create one on https://app.slack.com)
Steps
Slack App Integration
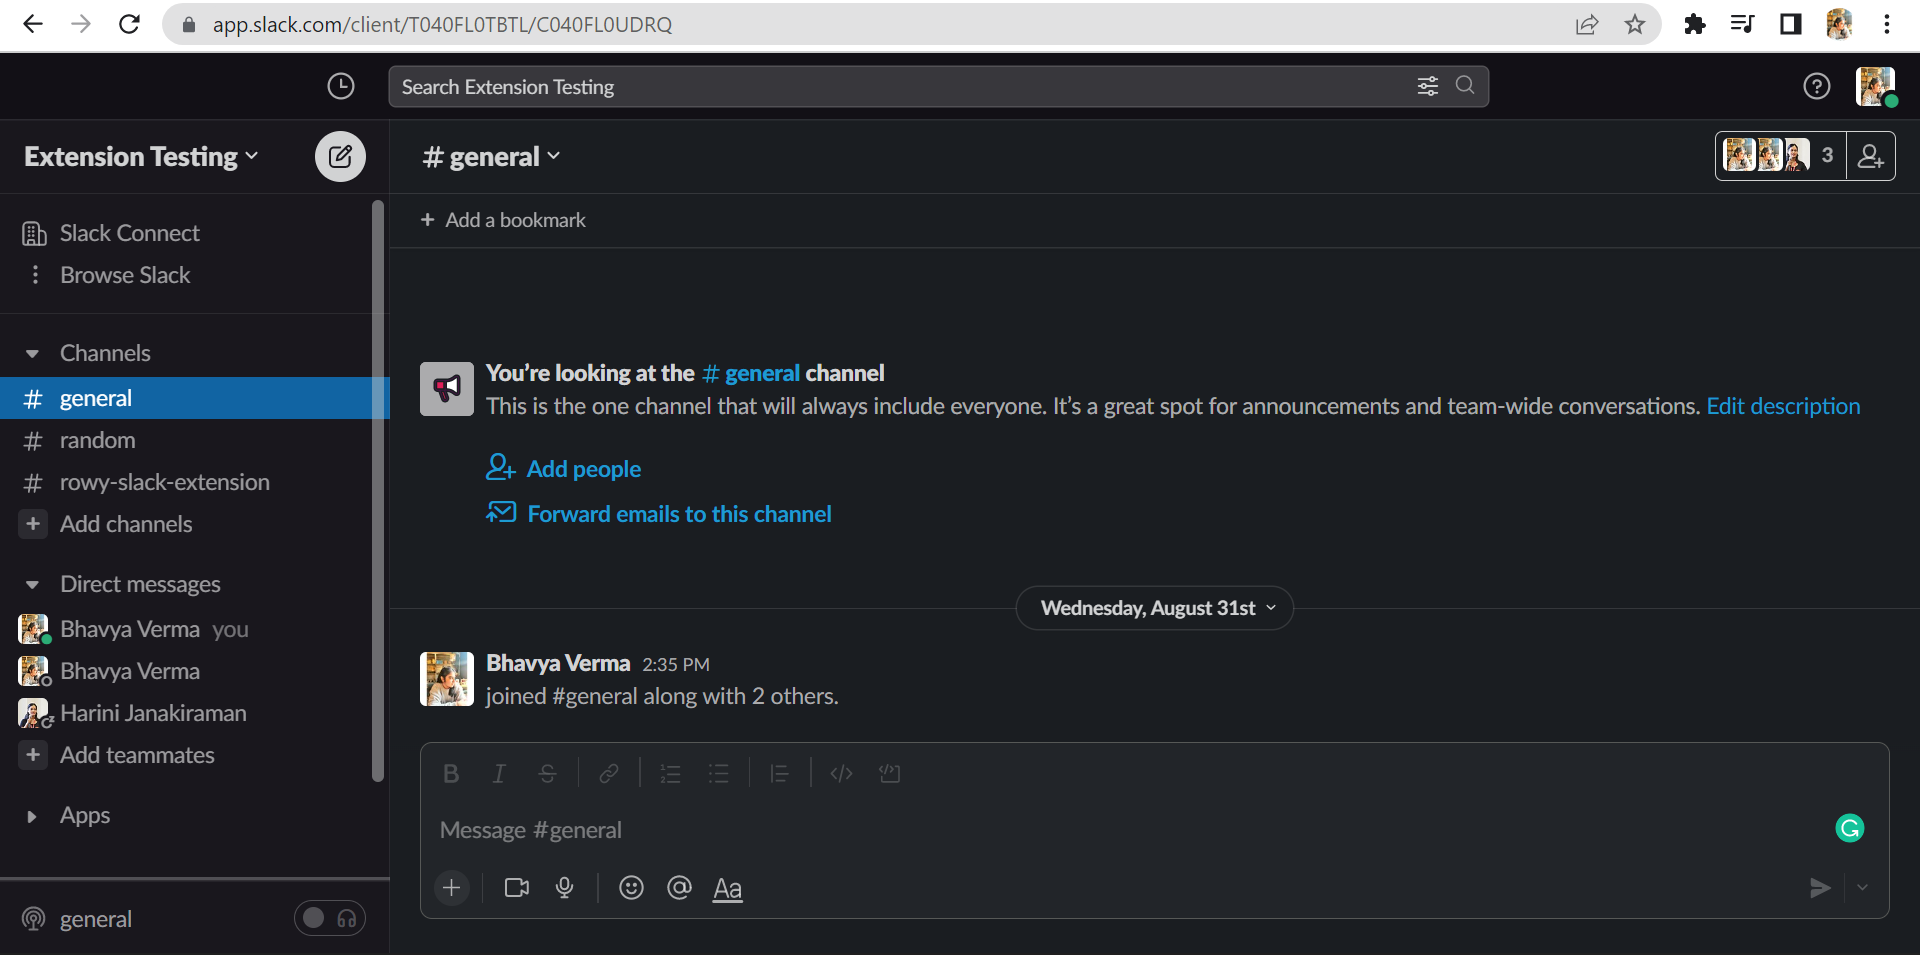
To begin creating a Slack Bot, we need to create or join a Workspace.
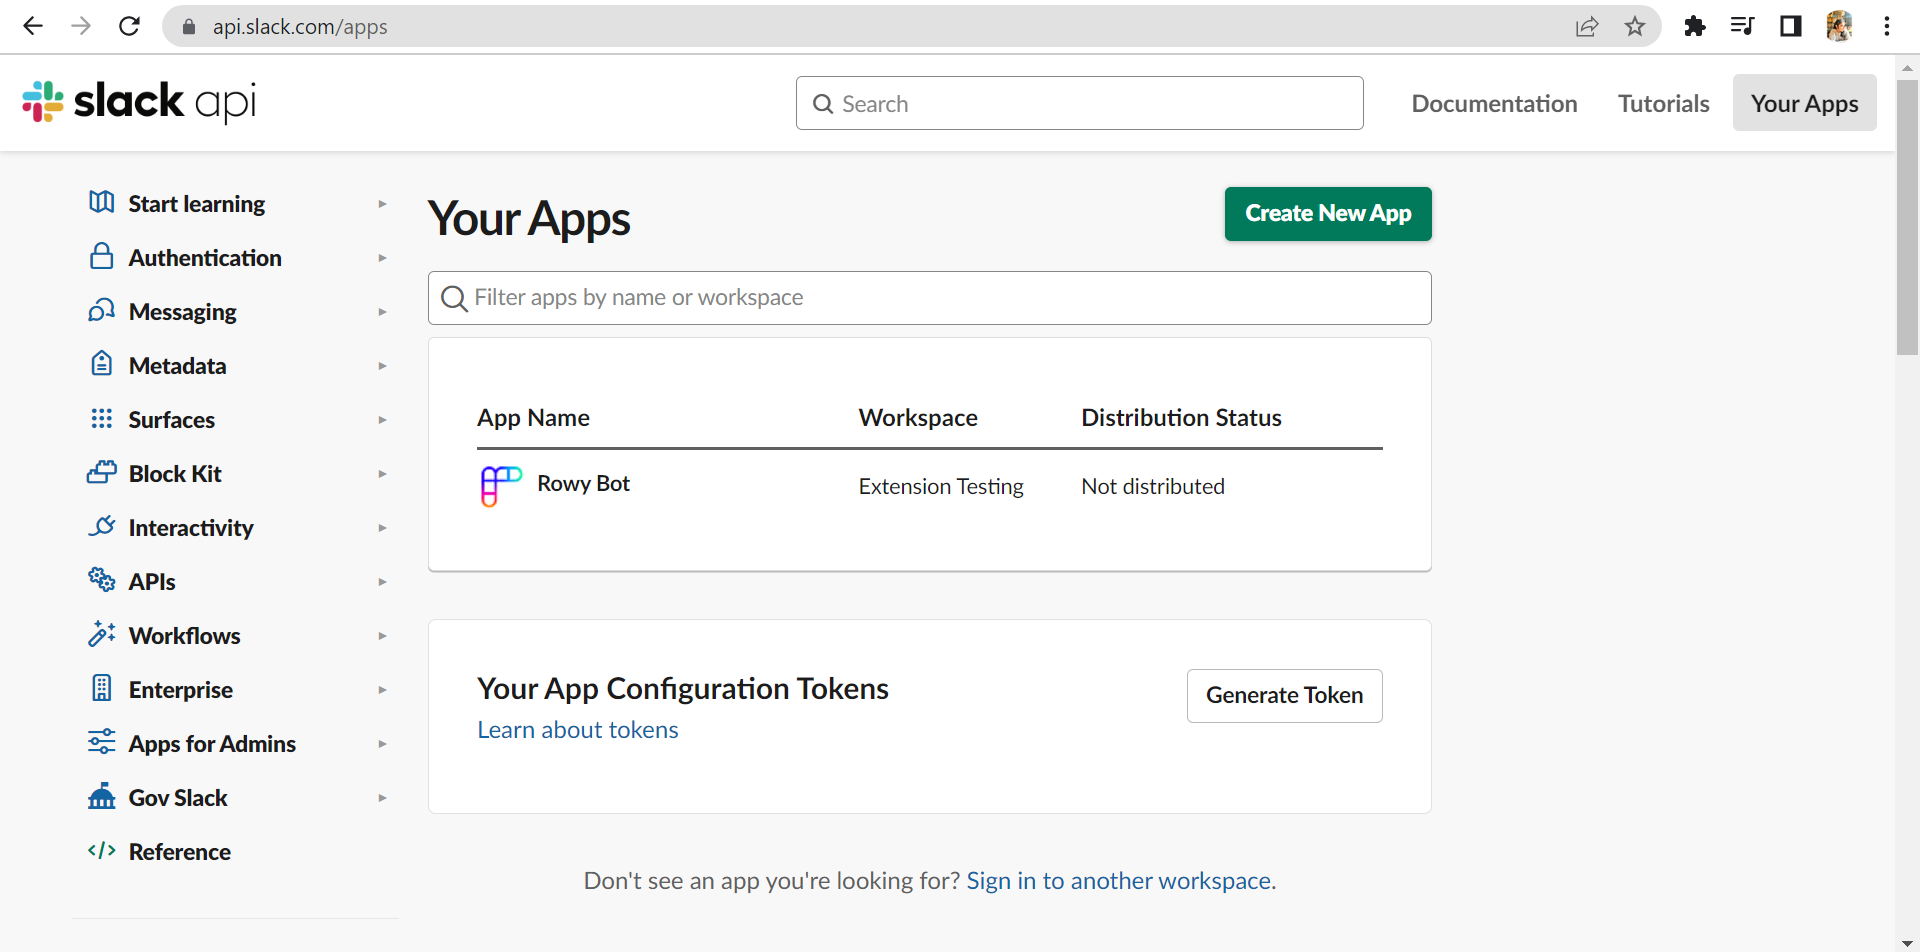
Now, we can head over to the Slack API website to configure the new app for our Bot. Click on the Your Apps button in the top right corner. This page will display all the existing apps you have created.
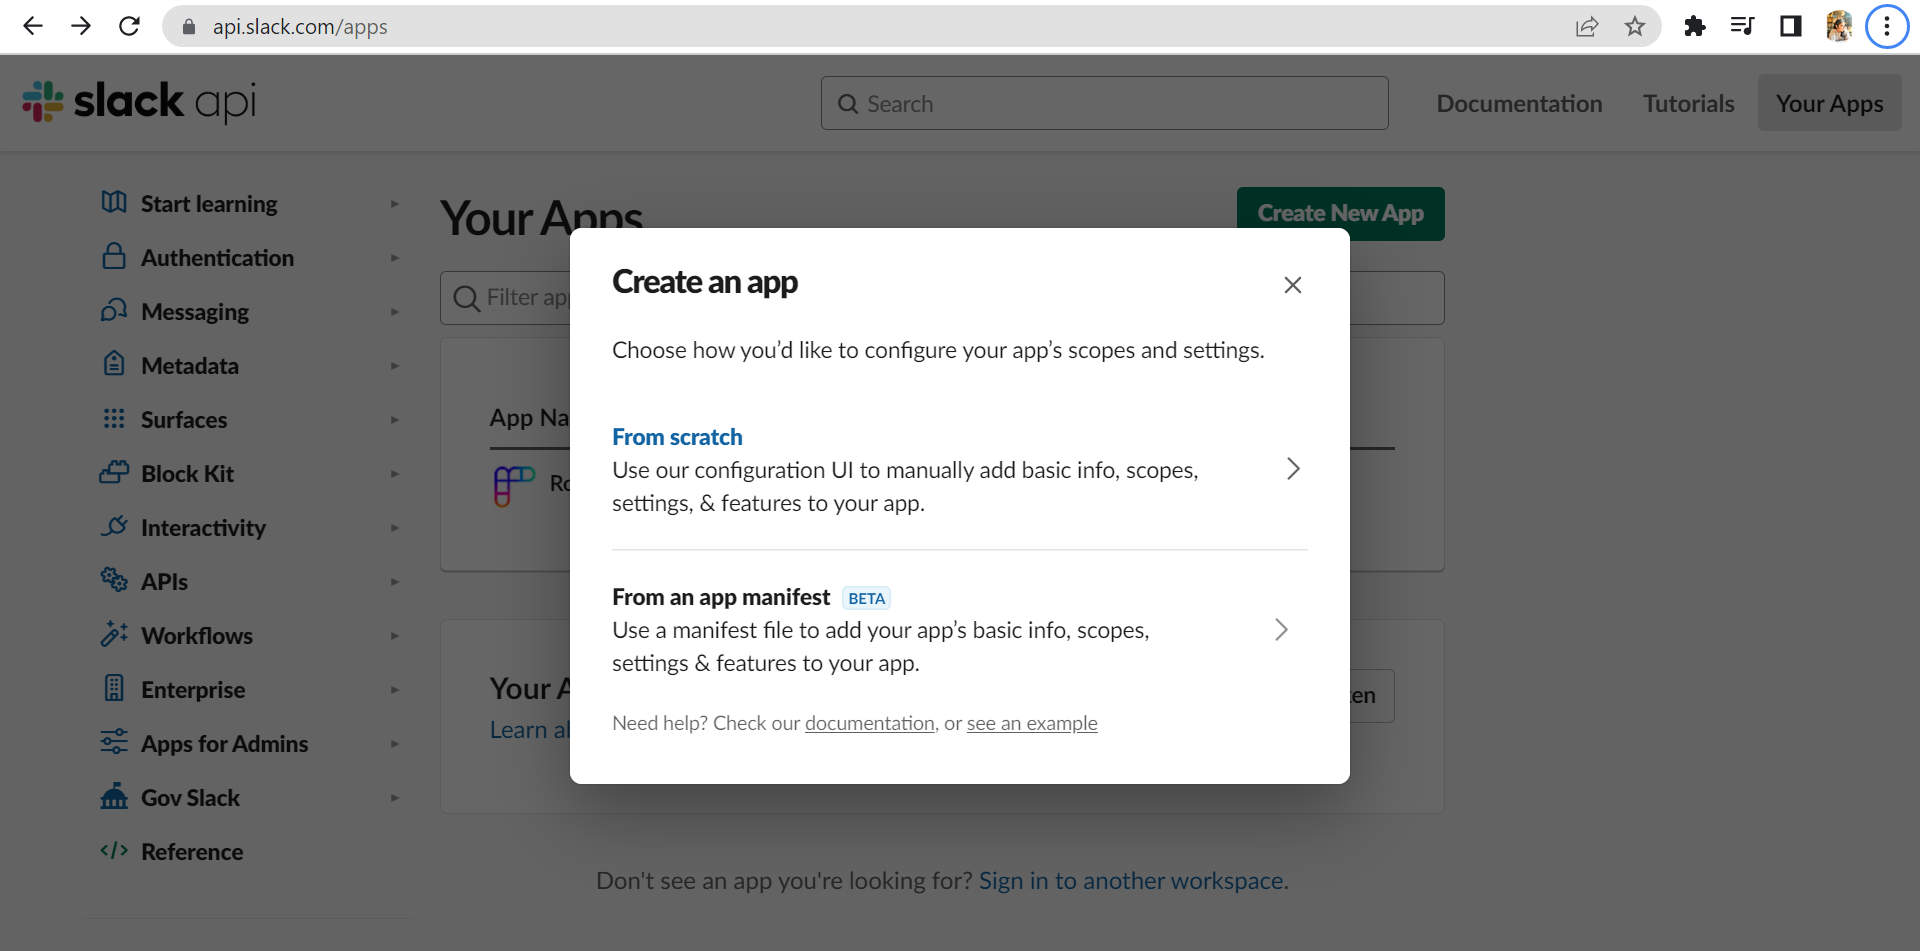
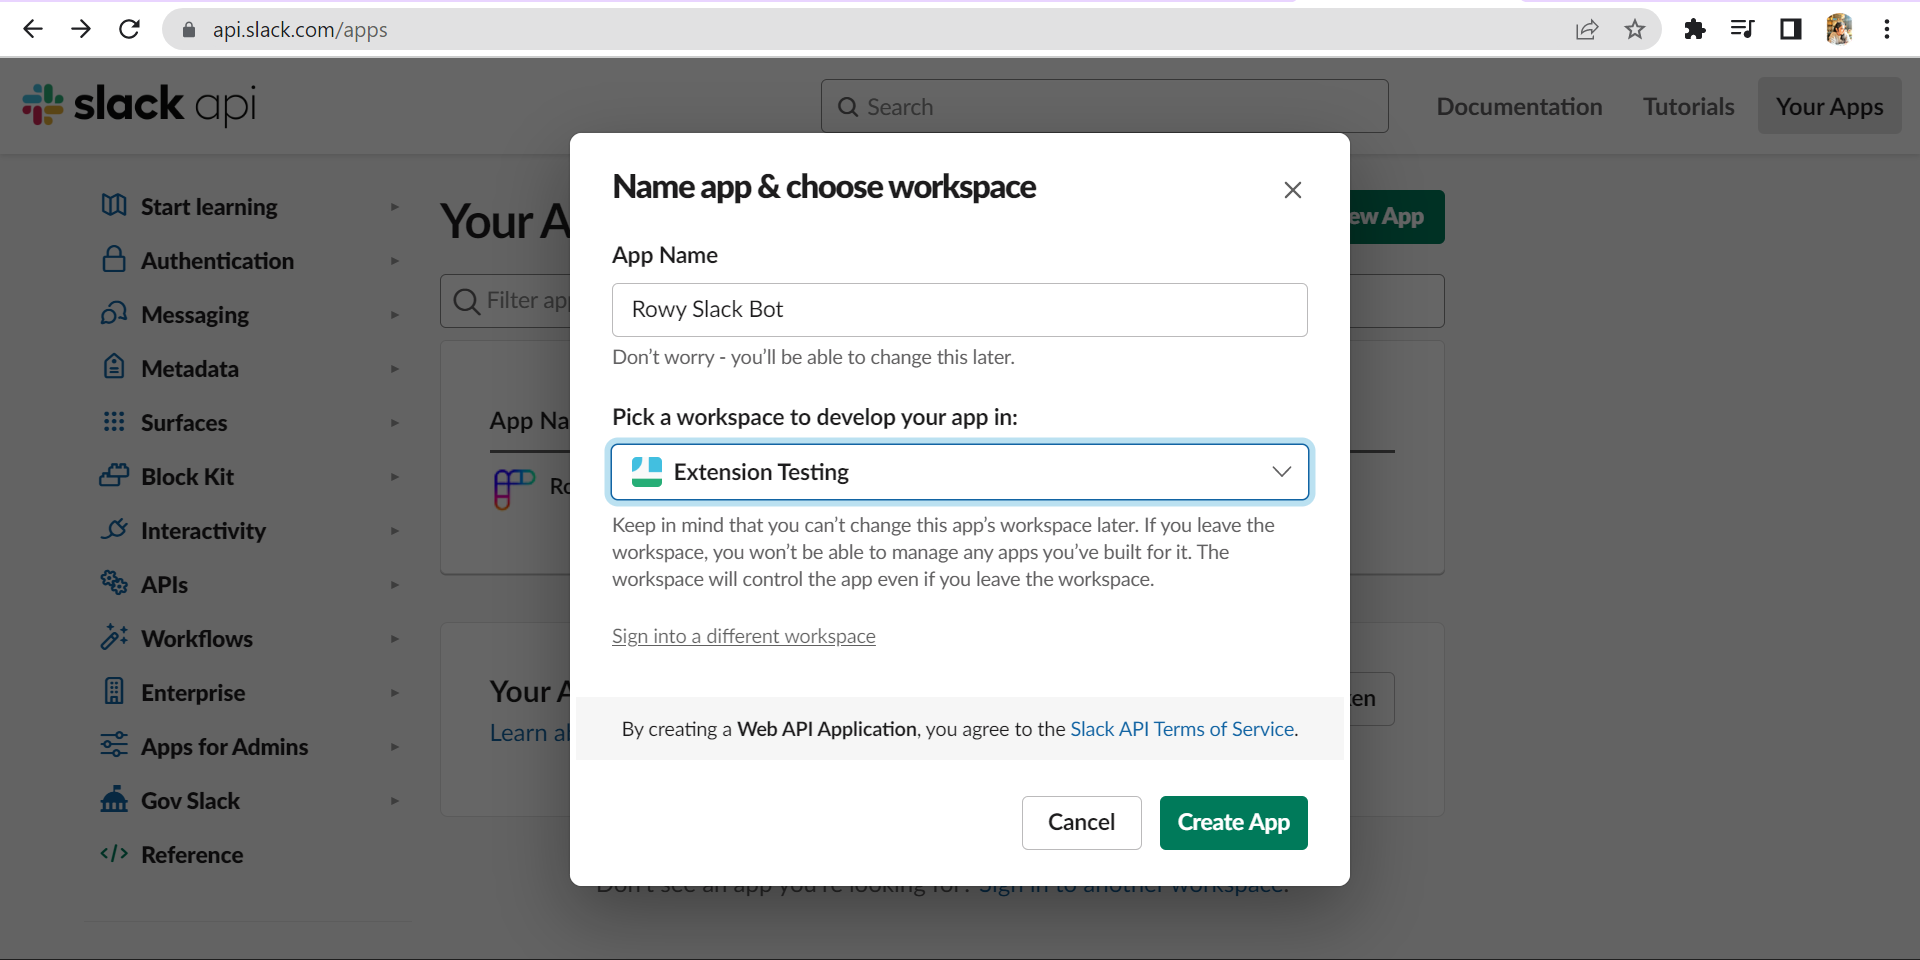
Click on Create a New App. A modal appears with options to select the configuration for the App scopes, settings, and features. We’ll be creating an app From Scratch.
If you have an existing manifest file, feel free to use the From an app manifest option.
Set an App Name and pick a Workspace to develop your app in. Click on Create App.
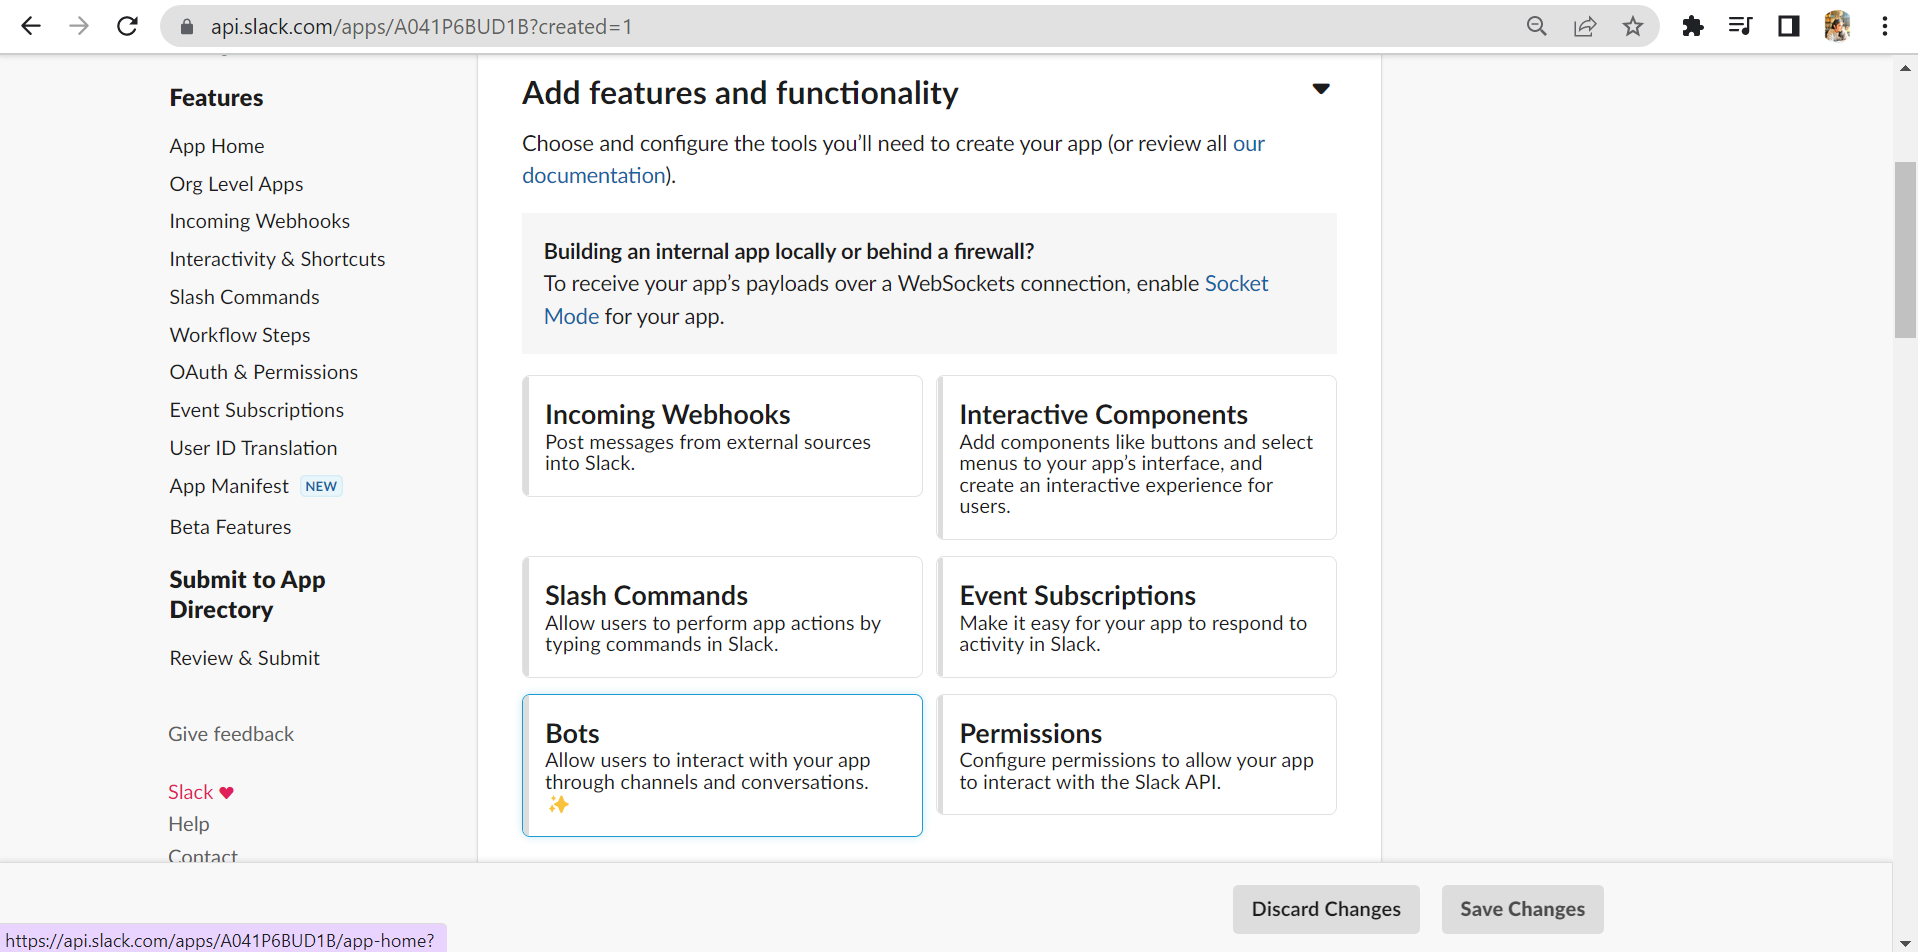
After creating the app, we will land on the Slack App Dashboard. Now, we’ll have to configure the features and functionalities our Bot will possess. Under the Add features and functionality section, click on Bots.
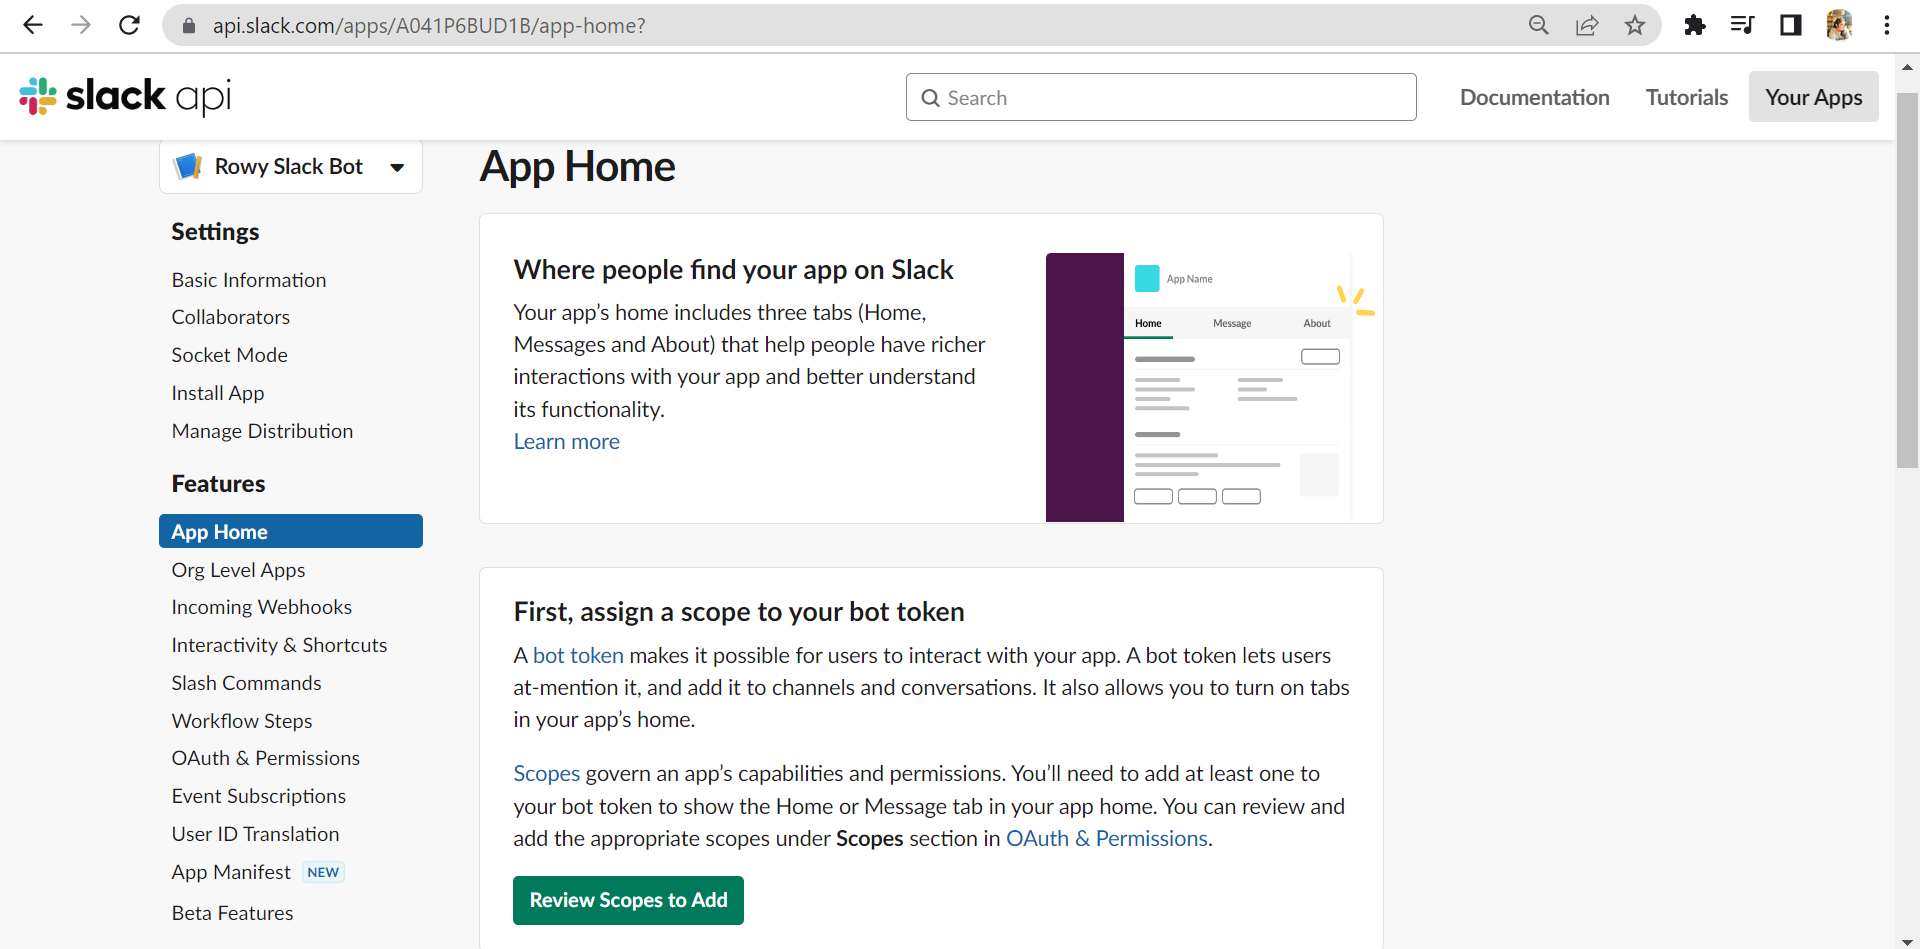
Further, we’ll be assigning scopes. In layman's terms, we’ll be giving our Bot permissions to perform activities in the channels, by going to the Review Scopes to Add section.
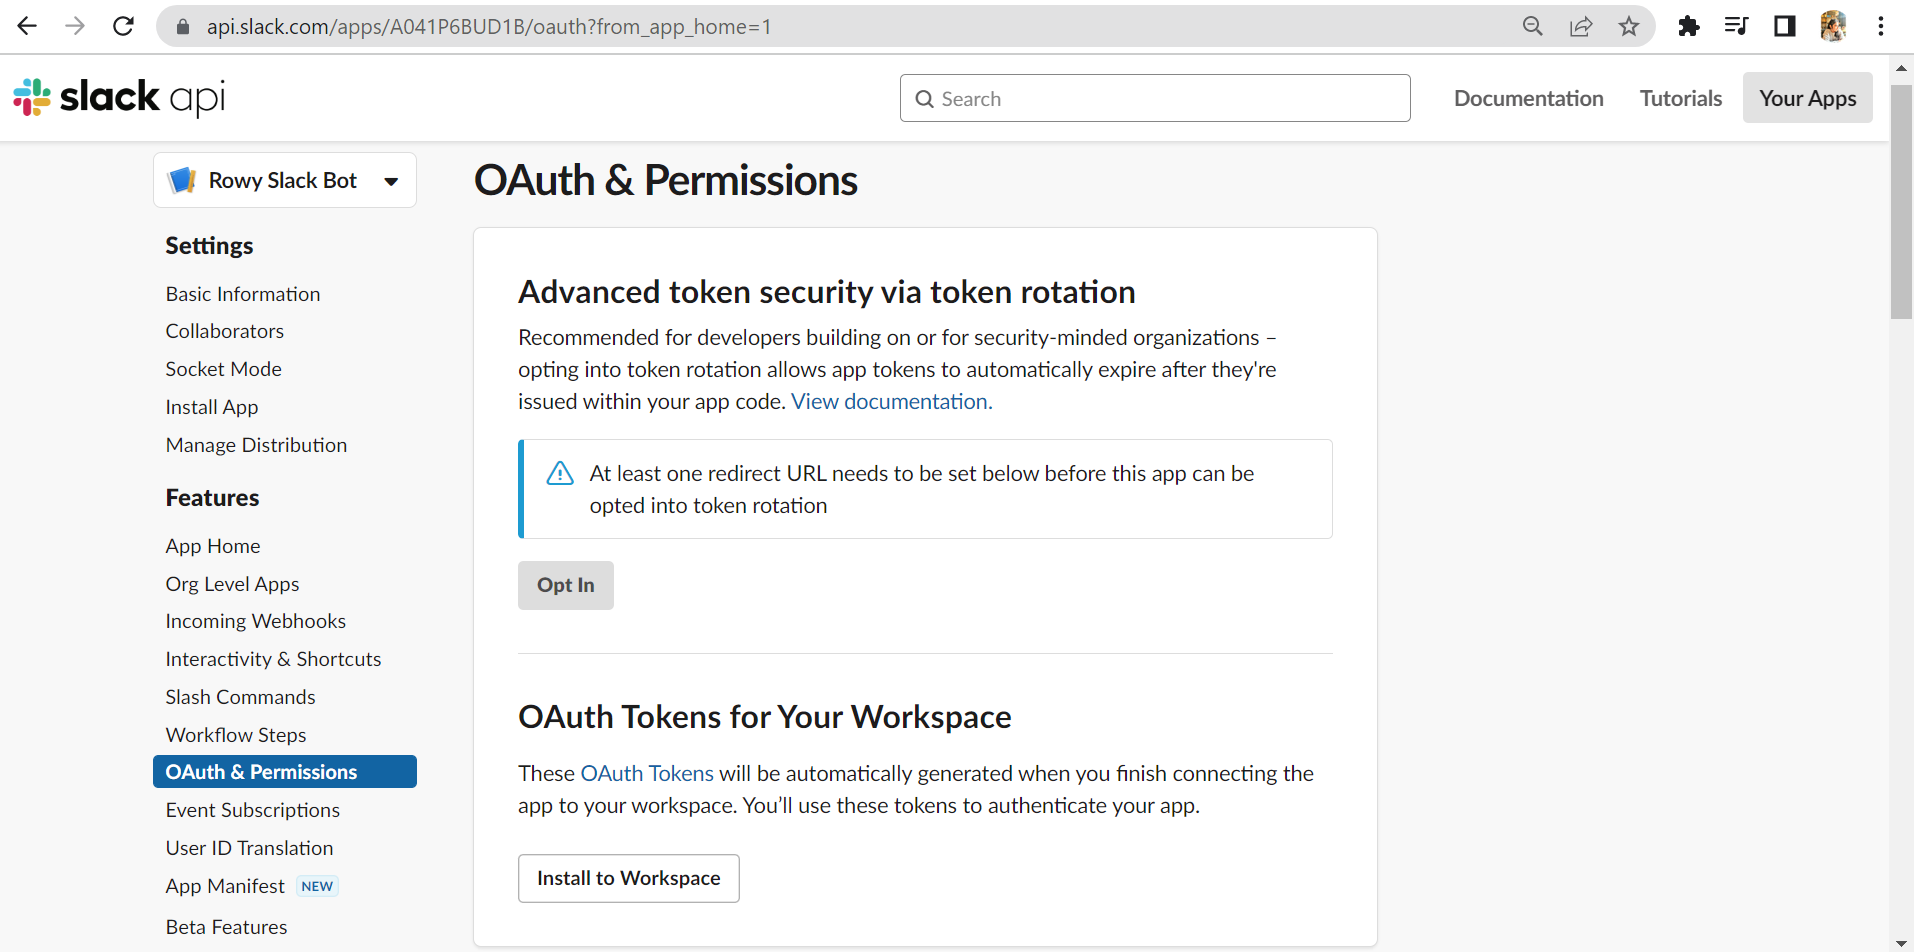
This will redirect us to the OAuth & Permissions page on the Slack App Dashboard. We’ll go down to the Bot Token Scopes section and Add permission by Scope or API method. We can now see that we have a list of different scopes and permissions for the Bot.
For now, we’ll only be needing the
chat:writepermission, which would allow our Bot to send messages to a channel. Users can add all the permissions if they wish to.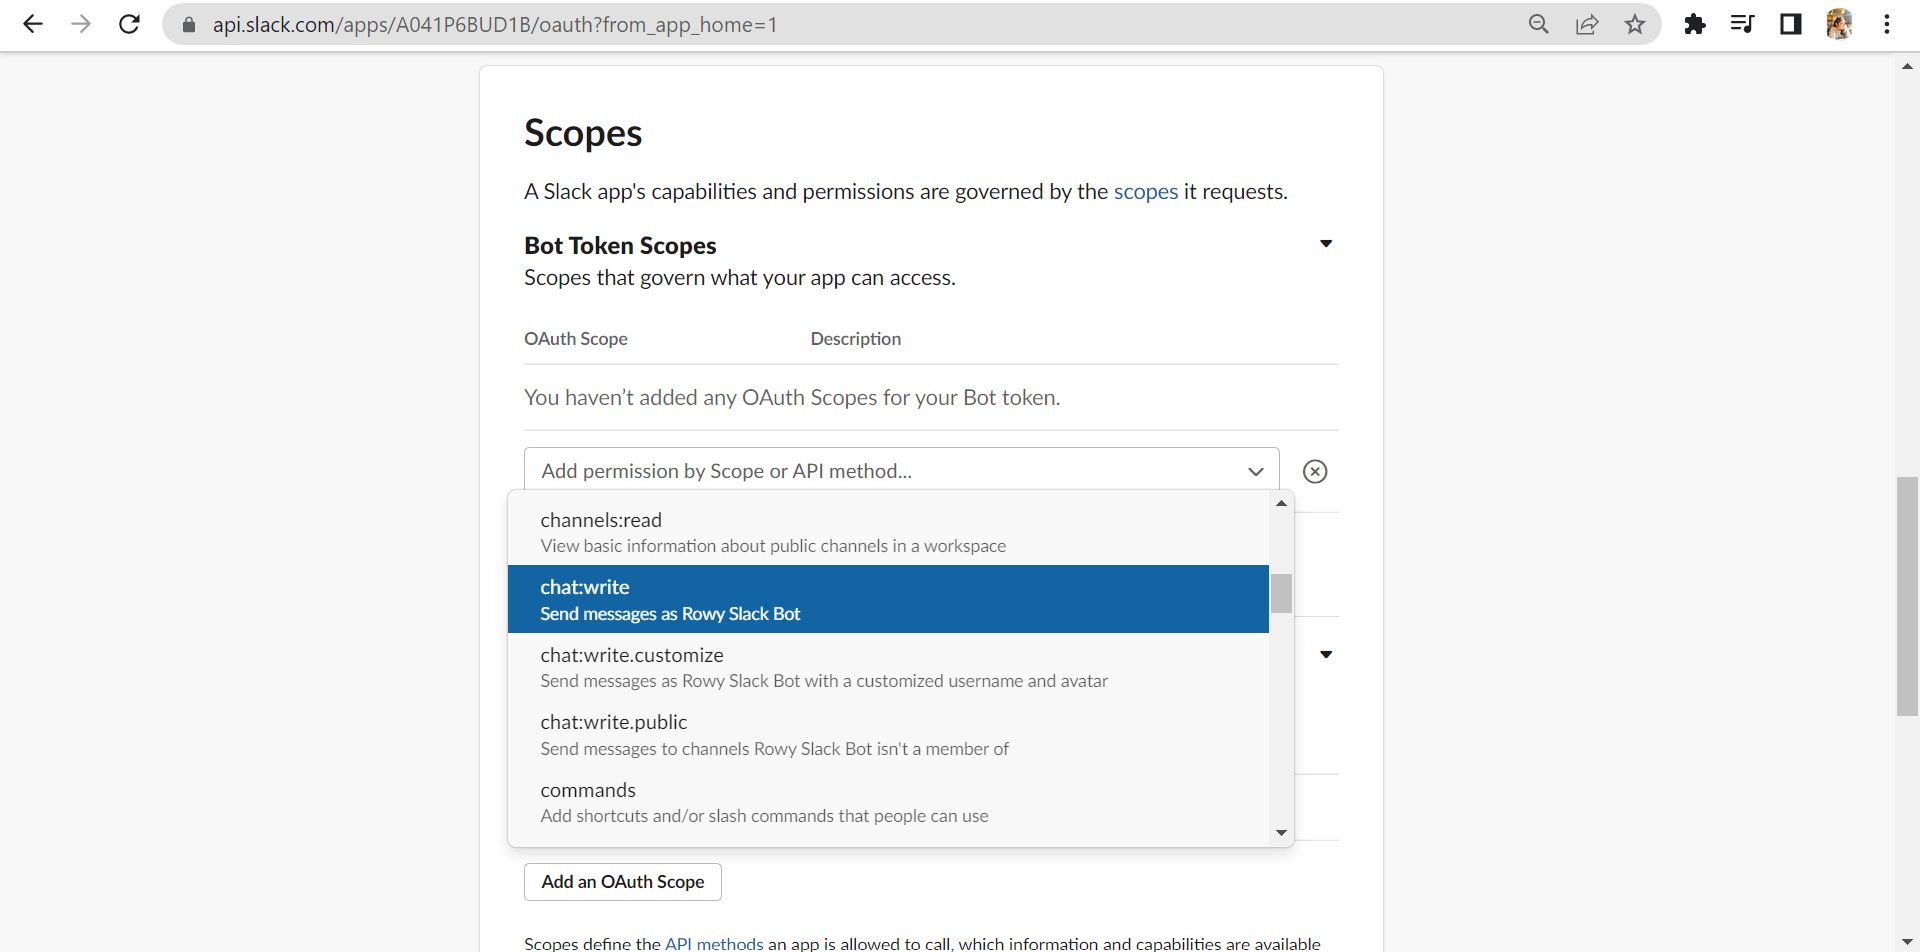
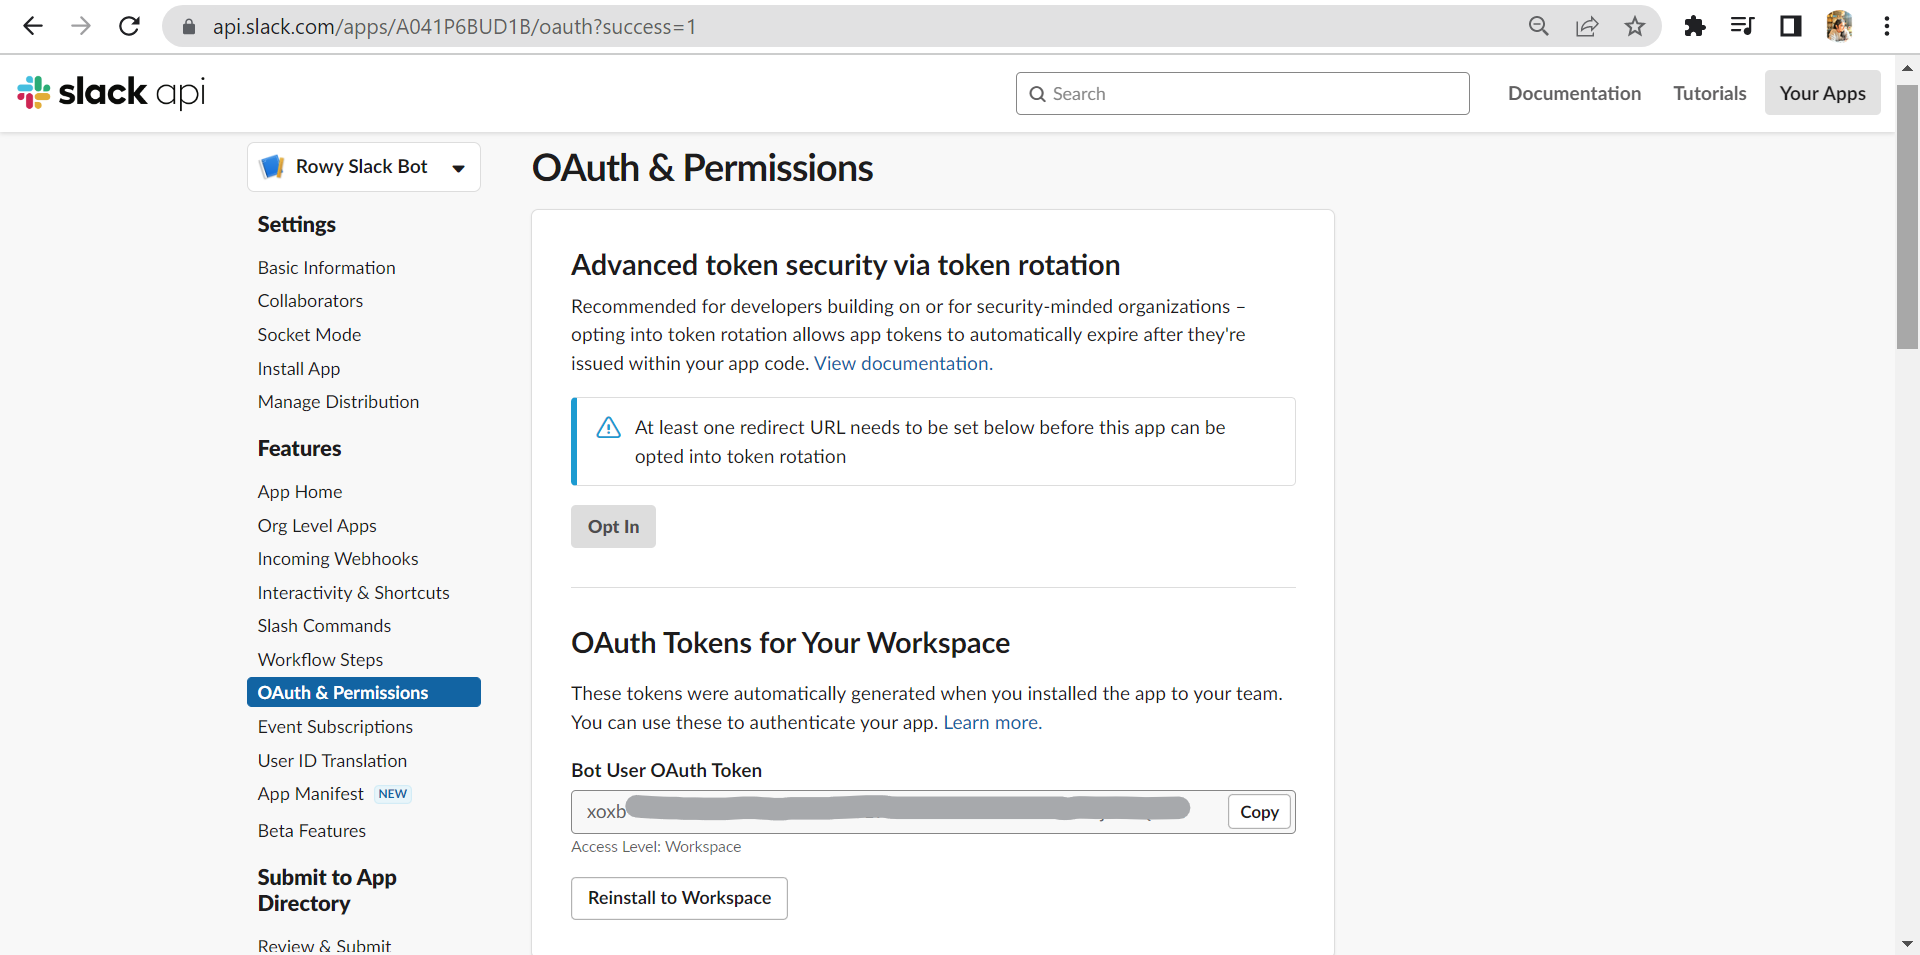
Now, we’ll have to generate a token for our bot. To do that, we first need to install the Bot in a Workspace. Click on the Install to Workspace button and follow as directed.
Now we can generate a Bot User OAuth Token for the Workspace. Copy the token using the Copy button available and store it temporarily in a file or notepad.
NOTE: If the user wishes to add or remove scopes after adding the bot to a workspace, the user might need to reinstall the app into the Workspace.
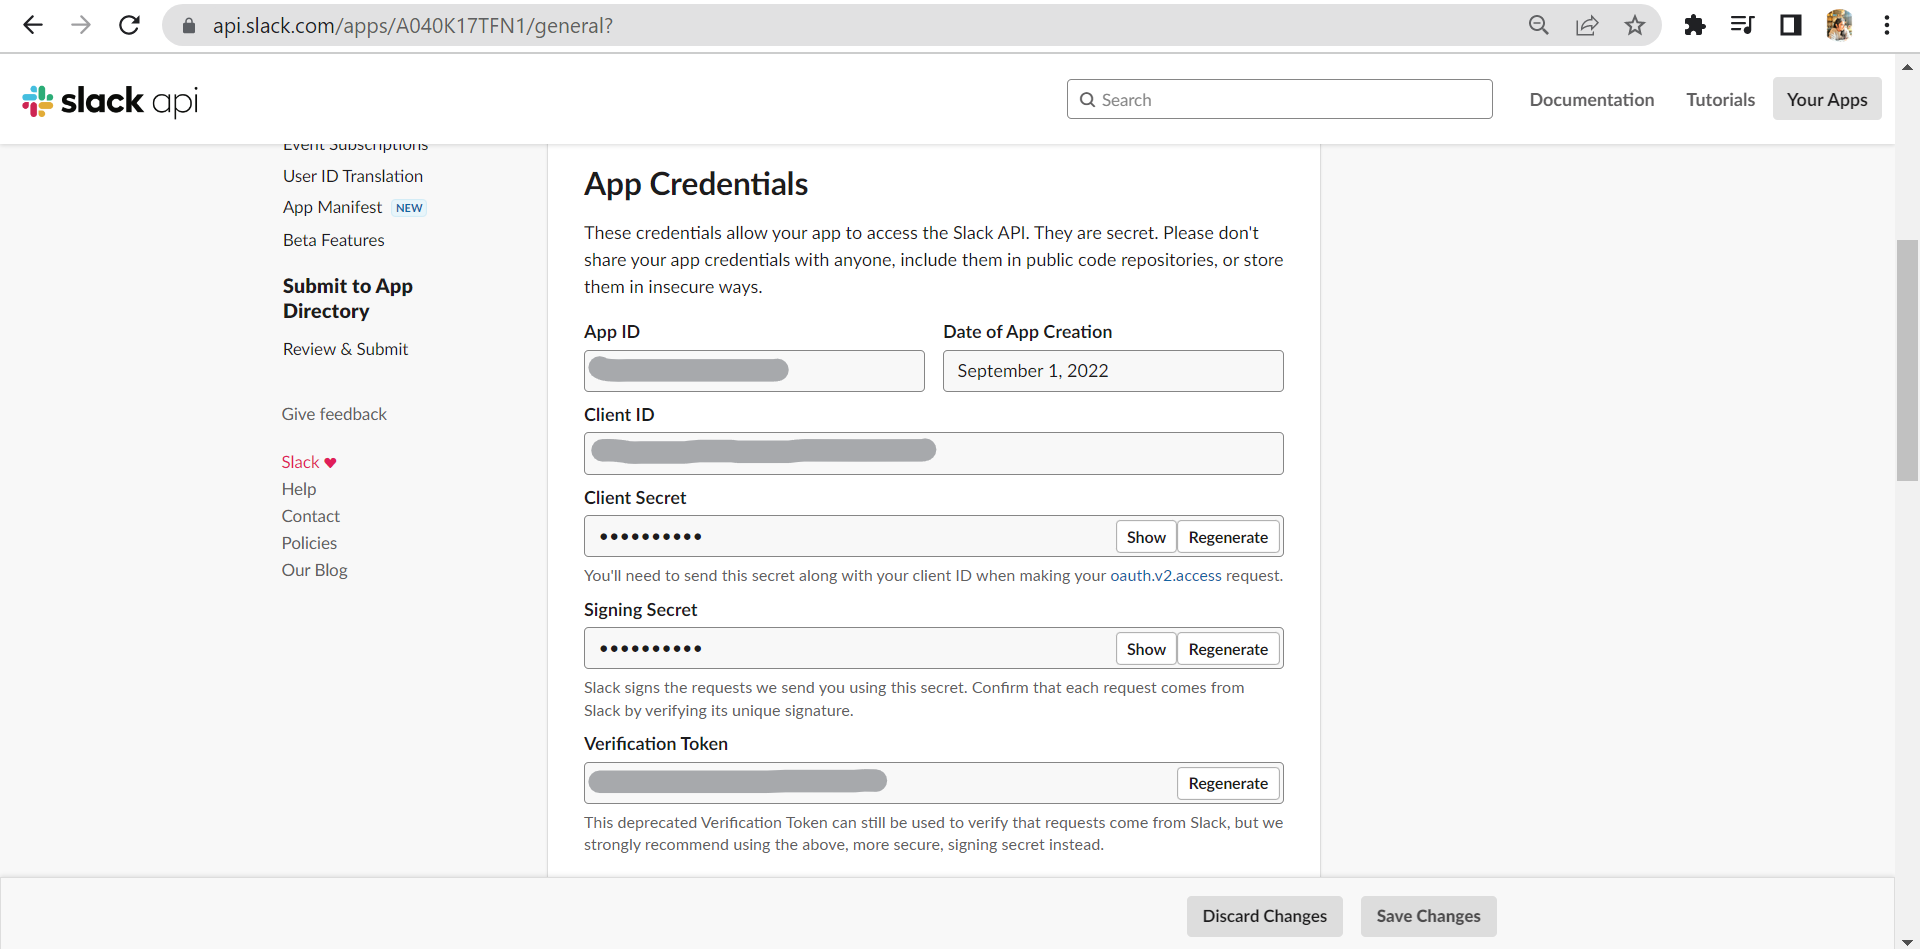
To connect our Bot to the Rowy Table, we’d also need the User Signing Key. To get that, navigate to the Basic Information section in Settings. Click on Show and store the token temporarily in a file.
Now, our Slack App has been set up. Add this App to the Slack Workspace and is now ready to be integrated with the Rowy Slack Extension.
Integrating the Slack App in Rowy
To integrate our Slack App with the Rowy Slack Extension, we first need to create a Rowy Table using steps in the documentation.
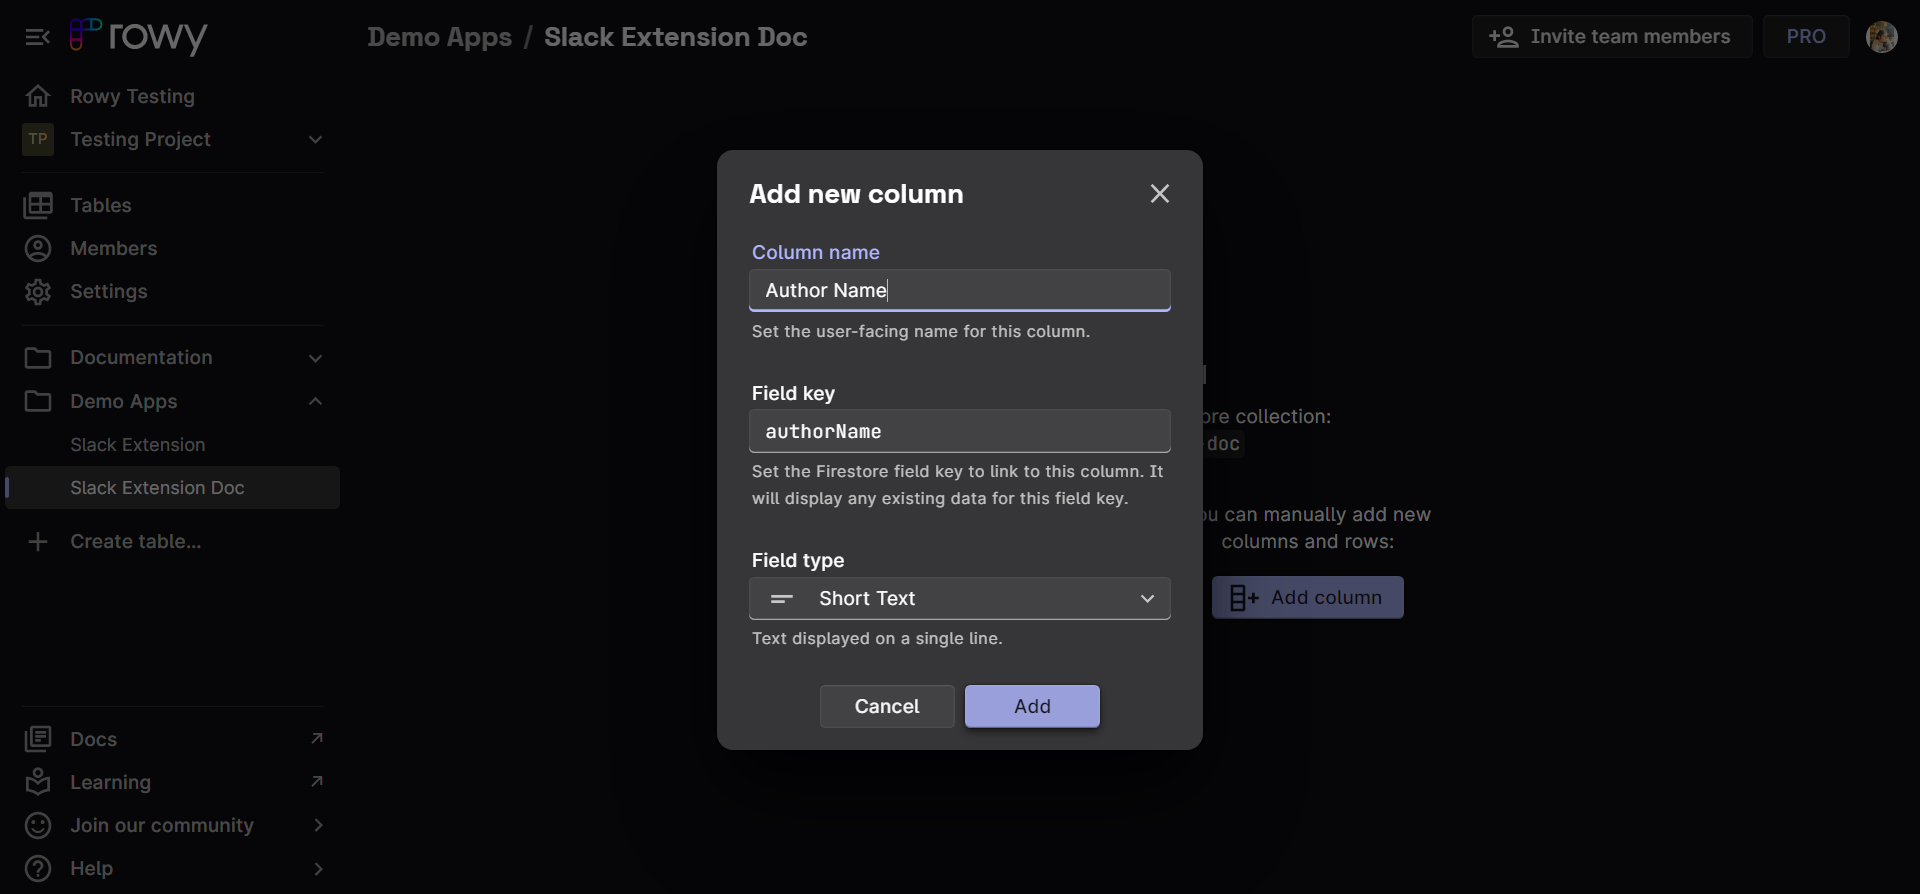
We need to create a new column for the Author Name, by clicking on the Add column button and entering the following values.
Let’s add another column for the Text we’ll send as an attachment to the Slack bot in the connected Workspace.
Next, we’ll be creating a derivative column, named Status, that shows “Sending Message” whenever the user inputs any data in the Text column. To accomplish that, we need to create a new column with the Field type as Derivative.

NOTE: To use the Derivative Field type, Rowy Run must be enabled in the Project to access the Google Cloud Functions.
Clicking on Next opens the Column Config modal. Set the Listener fields to Text and Output Field Type to Short Text using the dropdown.
Copy and paste the following code into the Derivative Script section. Click on the Update button and Deploy the changes.
const derivative:Derivative = async ({row,ref,db,storage,auth})=>{
  if(row.text) {
    return "Sending Message!"
  }
  else {
    return "Add a text"
  }
}
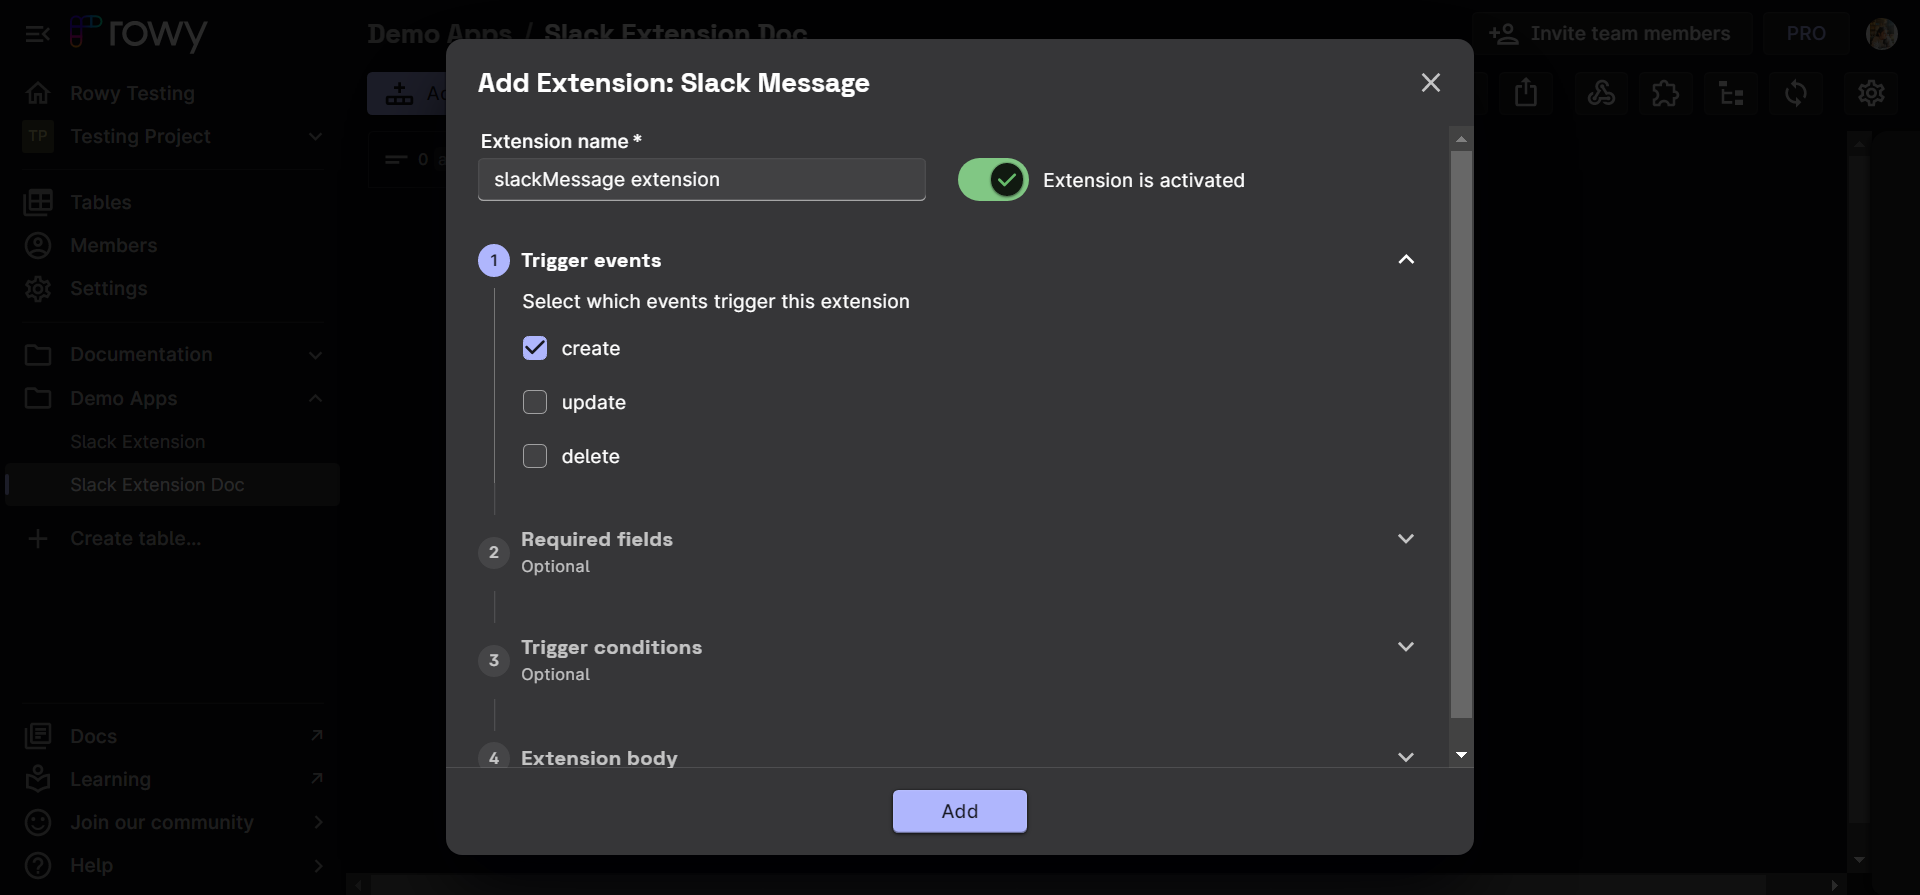
export default derivativeNow, we’ll use the Rowy Slack Extension to send messages to the Channels on our Slack Workspace. Click on the Extensions button (🧩) in the top right menu.
Click on the Add Extension button and select Slack Message from the dropdown. Toggle the Extension button to enable it.
Users can optionally add a suitable name for the extension. For the trigger events, we’ll select create since we require the Slack Bot to send a message every time a new row is created. Select Author and Text as the required fields.
Copy and paste the following code in the Extension body and replace the
SLACK_CHANNEL_IDwith theIDobtained from the Channel Details.const extensionBody: SlackMessageBody = async({row, db, change, ref}) => {
return ({
channels: ["SLACK_CHANNEL_ID"], // a list of slack channel IDs in string
blocks: [], // the blocks parameter to pass in to slack API
text: "", // the text parameter to pass in to slack API
attachments: [{
"mrkdwn_in": ["text"],
"color": "#937ee0",
"pretext": "A new row was added!",
"title_link": "https://rowy.app/p/hellothere123-g5fdrh/table/slackExtension",
"author_name": row.author,
"text": row.text,
"footer": "Built using Rowy",
"footer_icon": "https://raw.githubusercontent.com/rowyio/rowy/main/icon.png",
}], // the attachments parameter to pass in to slack API
})
}
export default extensionBody;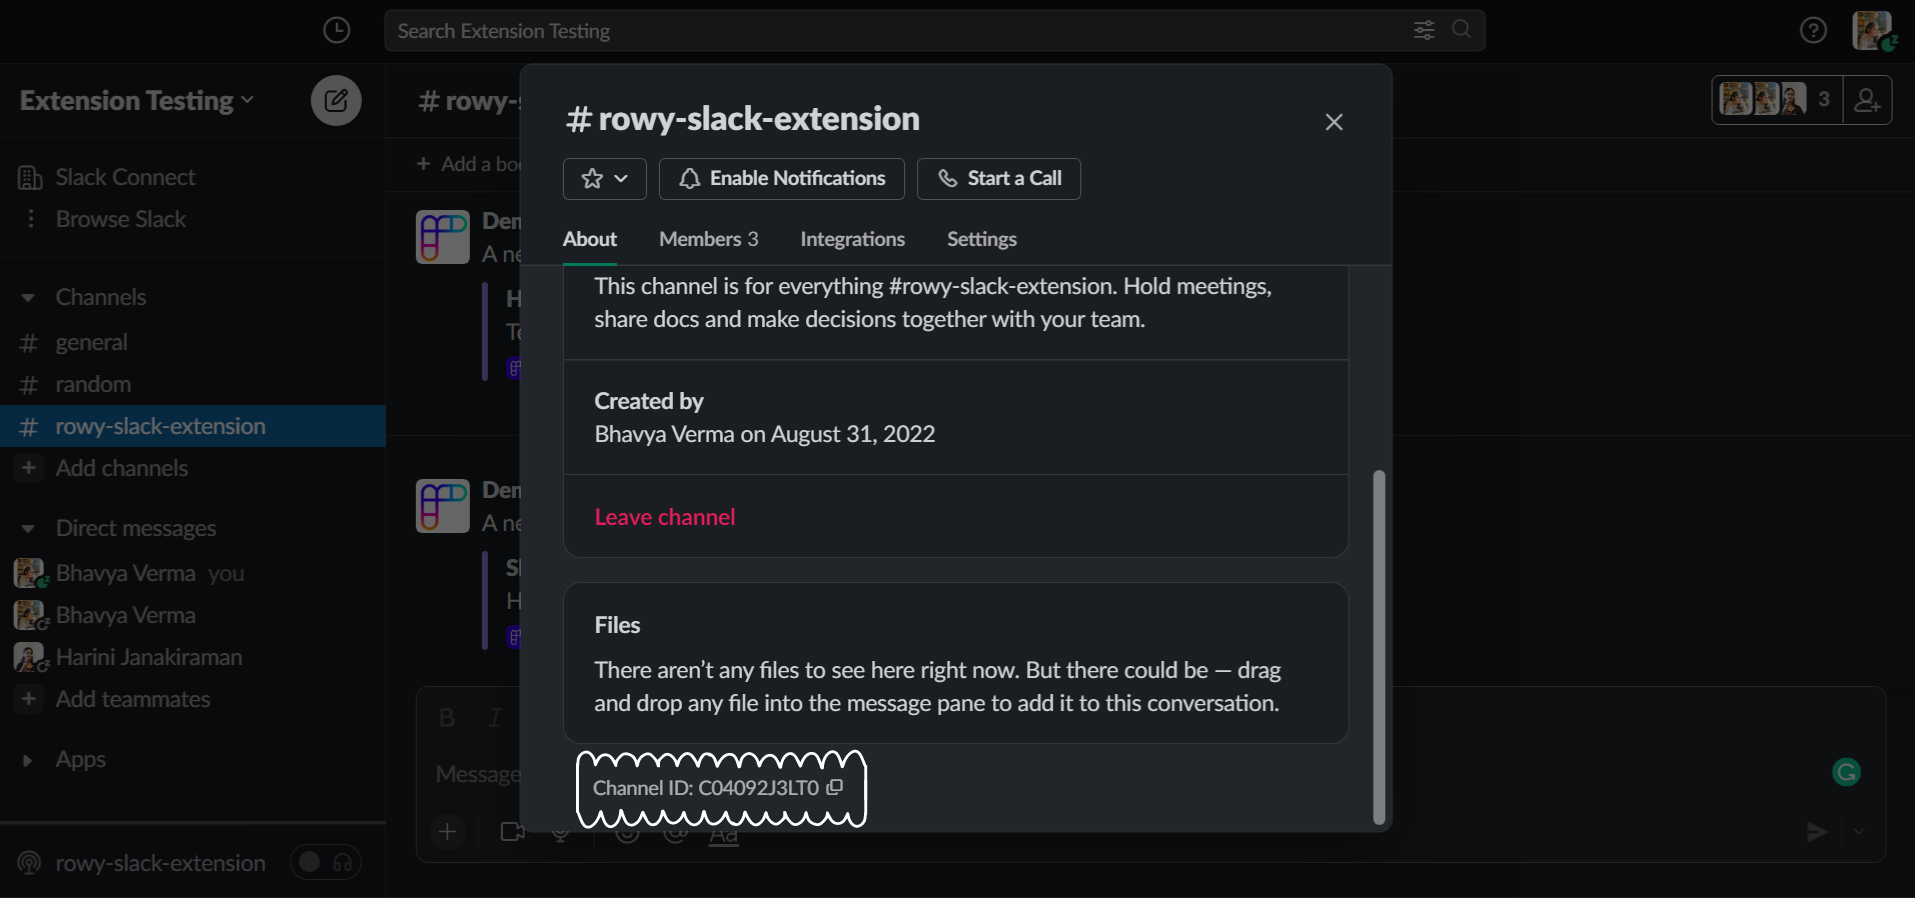
Lastly, we need to set up our Secret keys on the Google Cloud Platform. Click on the Key icon (🔑) under the extension body in the Extension configuration. This redirects us to the Google Cloud Secret Manager.
Click on the Create Secret button, set the name as
slack, and add the following to the Secret Value section.{
"token": "SLACK_APP_TOKEN",
"signingKey": "YOUR_SLACK_APP_SIGNING_KEY"
}Add the Slack App Token and the Signing Key saved earlier. Click on the Create Secret button.
Our Slack Bot is now ready! 🎉
Try it out by adding a new row to your Rowy Table. Be creative, and customize the Slack message body by trying out different fields!